Your lens isn't wide enough? Your location isn't big enough? Don't worry! Gaoyiling Panorama will teach you how to stitch together panoramic shots!
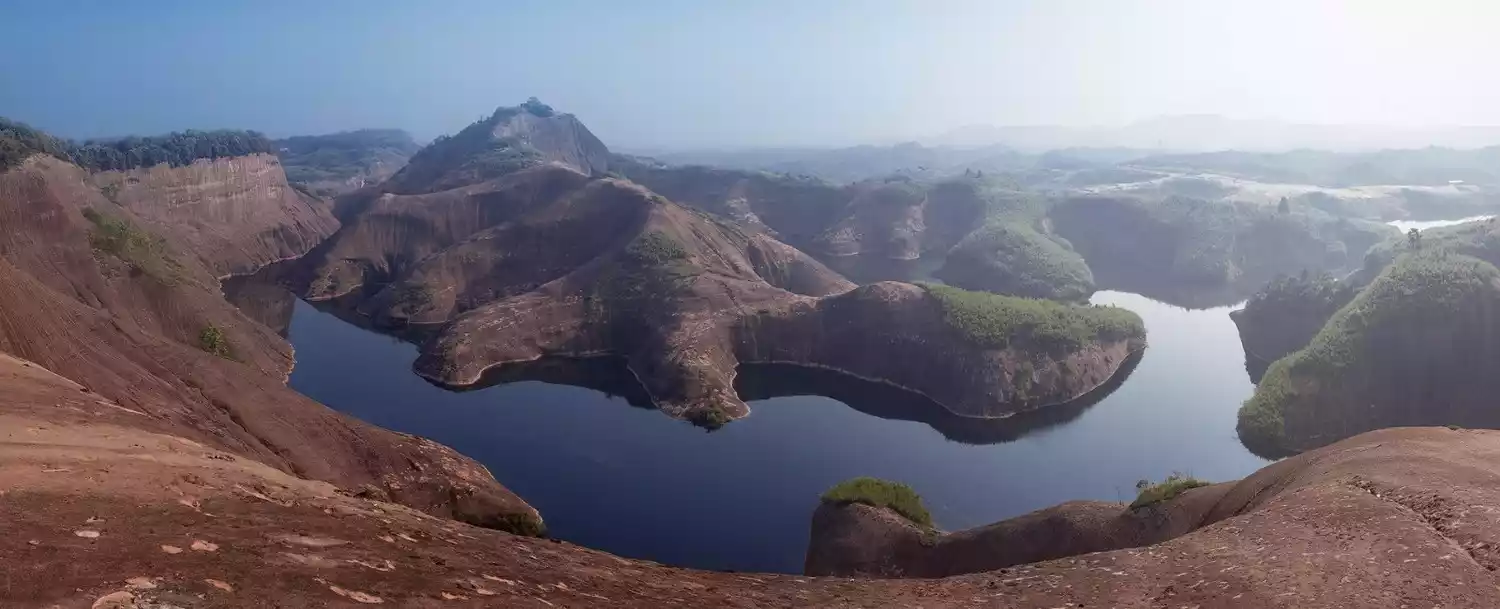
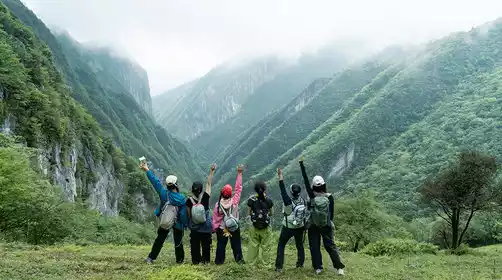
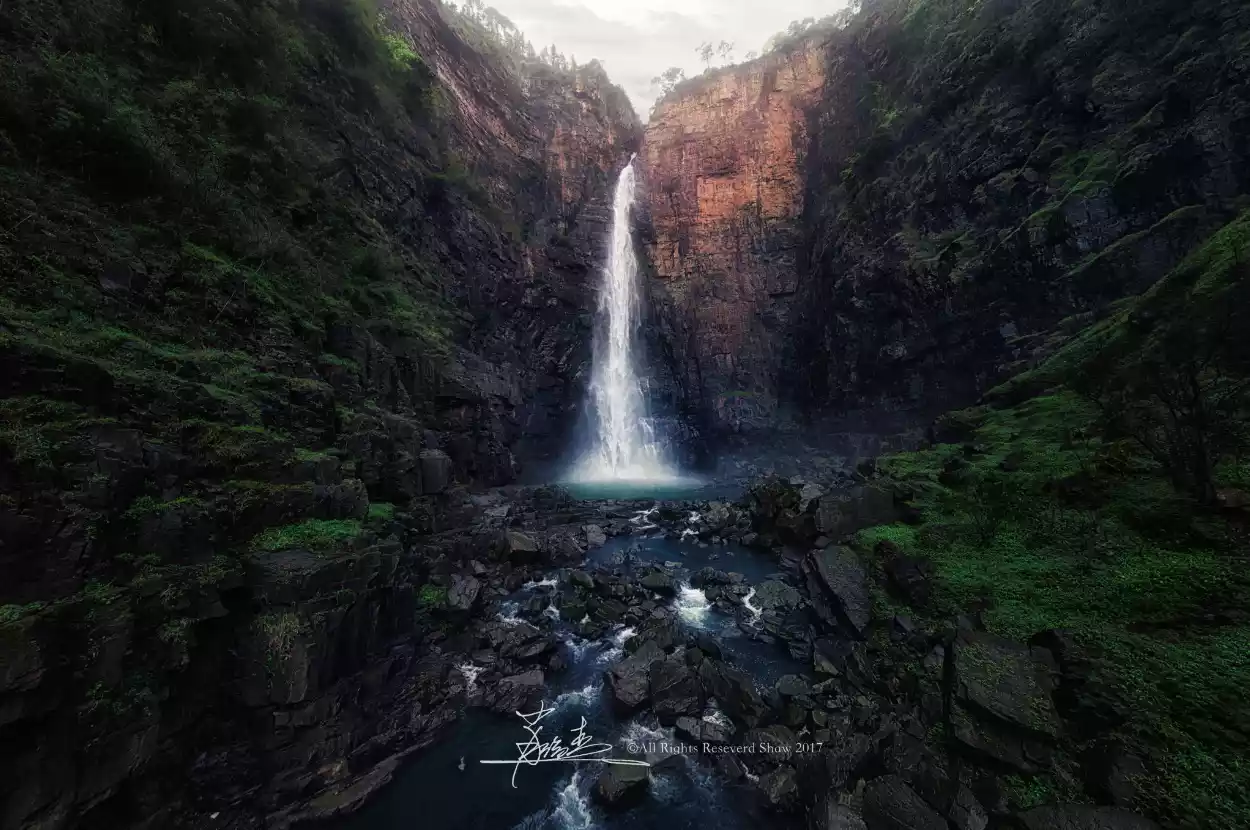
(Panoramic view of Gaoyiling)
Gaoyiling belongs to Danxia landform. Different from many other Danxia landforms, Gaoyiling has more soft curves. One of the unique wonders of Gaoyiling is the Giant Lizard Mountain in the picture, which looks like a giant lizard circling and wagging its tail playing in the lake, vivid and lifelike.
Panoramic stitching
What is panoramic stitching?
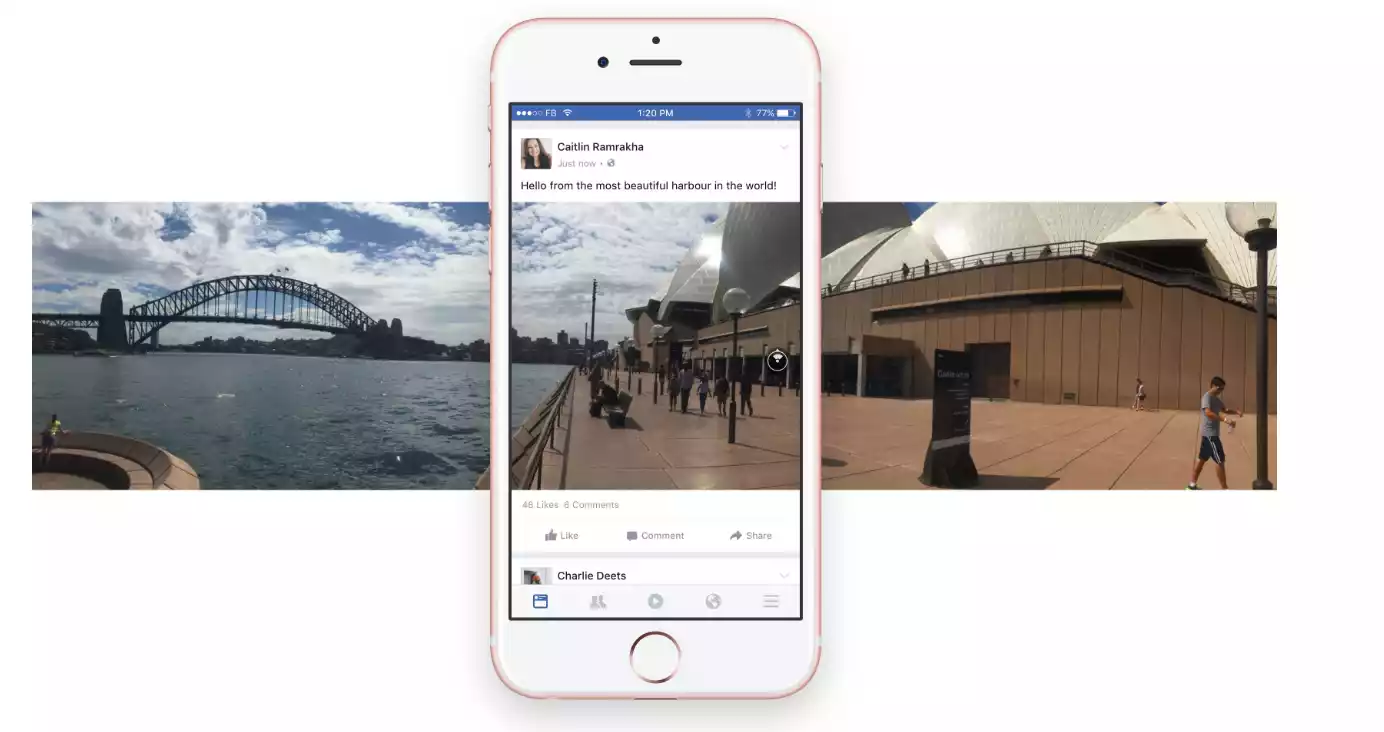
(Mobile phone panoramic shooting function)
In fact, it is very simple, just like the panoramic shooting function of a mobile phone. For some large scenes, due to the limitations of our position or the limited field of view of the equipment's lens, we can only get images within its range. If you want to include more images in the picture, you need to use the stitching function.
Note: Panoramic stitching on mobile phones involves rotating the image, with the phone itself performing the calculations and stitching. This has the advantage of being convenient, making it easy for anyone with no prior photography or post-production experience to operate. However, this also has a drawback: if the center of rotation fluctuates significantly, or if there's excessive vertical movement, the automatically stitched photos can easily look unnatural. This is another example of how the convenience of mobile phone panorama functions compromises their rigor. Therefore, camera-based panorama stitching is typically performed using computer photo editing software, with any stitching imperfections then manually corrected. While this approach may not be as convenient as a mobile phone, it's often more user-friendly and produces better results.
A scene suitable for panoramic stitching?
We don't need to use panorama stitching for every scene, but we often use it for grand and magnificent scenes that cannot be recorded with a single frame. Okay, let's look at some examples.
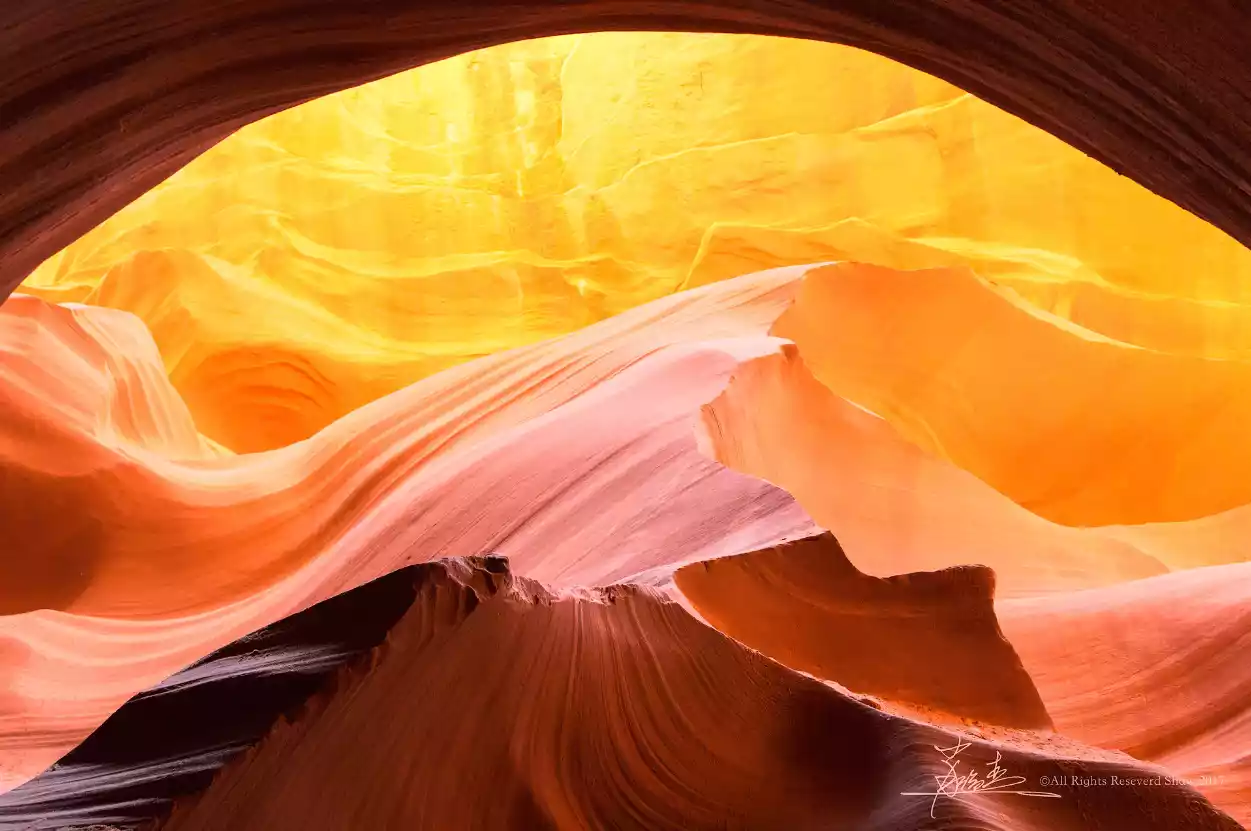
In a photo like this, I just want to record the beautiful light and shadow of the local Antelope Canyon and the details of the stone texture, rather than the magnificence of the large scene, so I will not use stitching but directly shoot the local part.
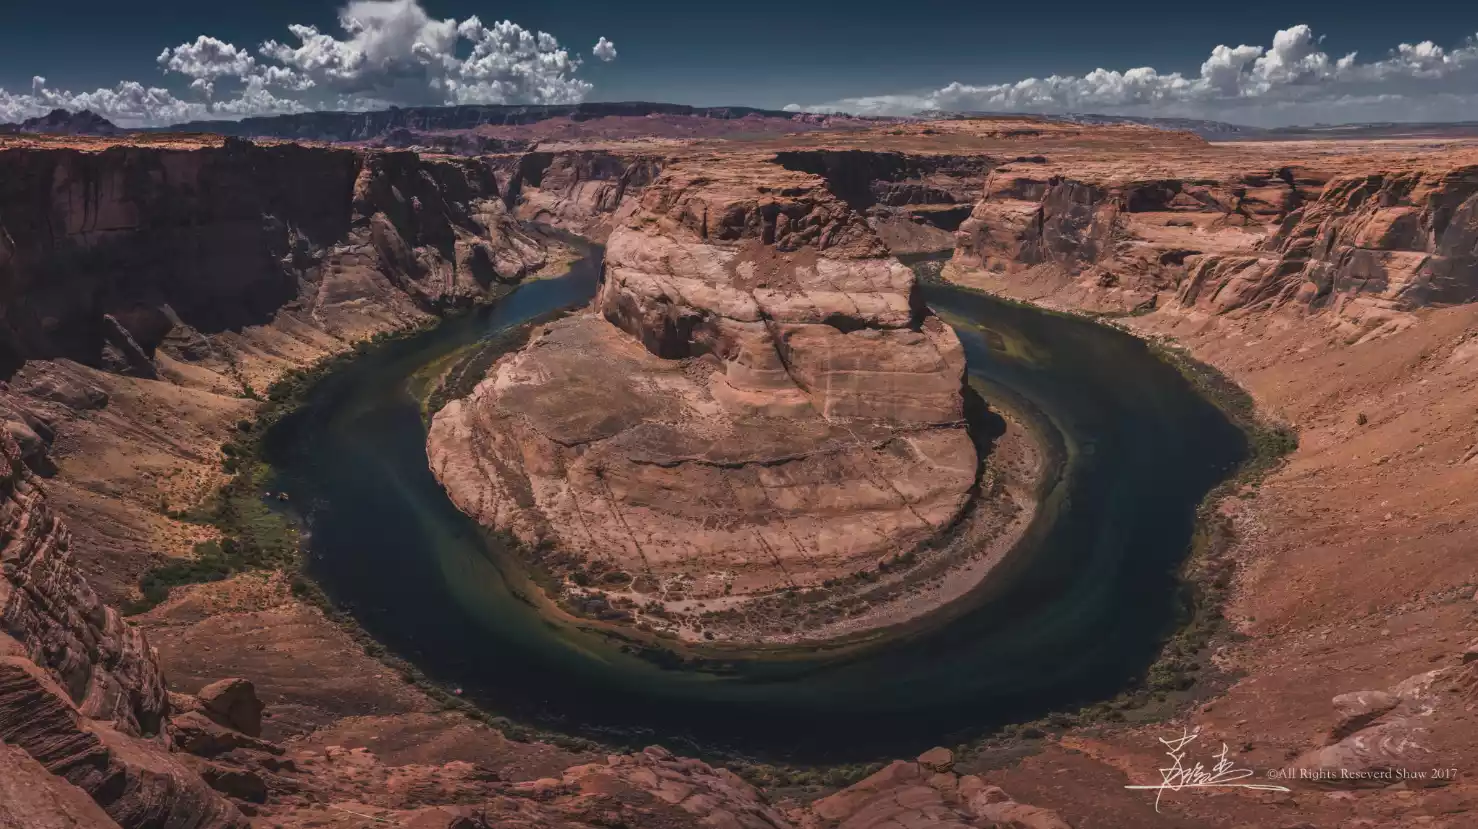
Like this photo of Horseshoe Bay taken while standing on the cliff, the 17mm ultra-wide-angle lens I used was still far from enough to include it in the picture. In the end, I chose to stitch five vertical photos together. This is due to the limitations of the position and lens.
Let's look at another panoramic photo in the canyon. Because I was very close to the waterfall and the cliffs on both sides were very narrow, I still used vertical format to shoot multiple photos and then stitch them together. This broke through the limitations of location and lens, while enhancing the perspective and grandeur of the picture.
Generally speaking, we usually use panoramic stitching when we are shooting 1. magnificent scenery and 2. scenes with limited location and lens.
How to stitch panoramic photos?
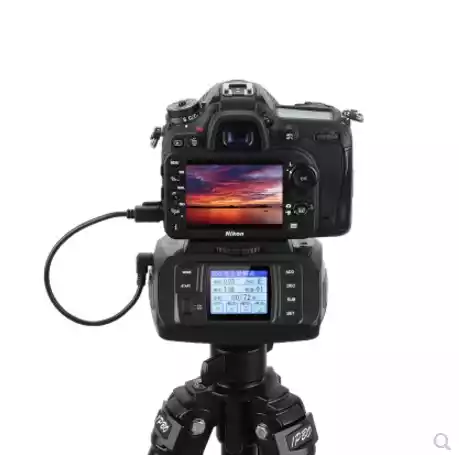
(The picture shows an electric pan-tilt head for automatic panoramic photography on Taobao)
Many people wonder... Is it necessary to use these motorized pan/tilt heads for panorama stitching? Otherwise, how do you know where to shoot each frame? How many frames should you take? How do you move the pan/tilt heads?
In fact, the preliminary shooting for panoramic stitching is very simple. You only need to ensure coaxial rotation as much as possible (you can use handheld continuous shooting or a tripod) to capture the general picture and then shoot the scenes that need to be stitched separately.
1. Often, a slightly longer focal length than the required focal length is used for shooting, so that there is extra space for cropping (vertical direction) when the film is not level after splicing.
2. When rotating the camera horizontally, it is usually better to take more photos on the left and right sides to leave room for cropping later. (Horizontal direction)
3. There should be a 1/3 to 2/3 overlap between the photos that need to be stitched to ensure that the software can successfully identify the overlapping elements for stitching.
Note: There are only two things you need to ensure during the entire process: First, try to rotate the camera on the same axis (do not move the camera drastically). Second, try to capture as many extra frames as possible (at least to leave room for cropping and distortion in the later stage).
Then let’s take a look at the analysis of the panoramic splicing location in the picture below.
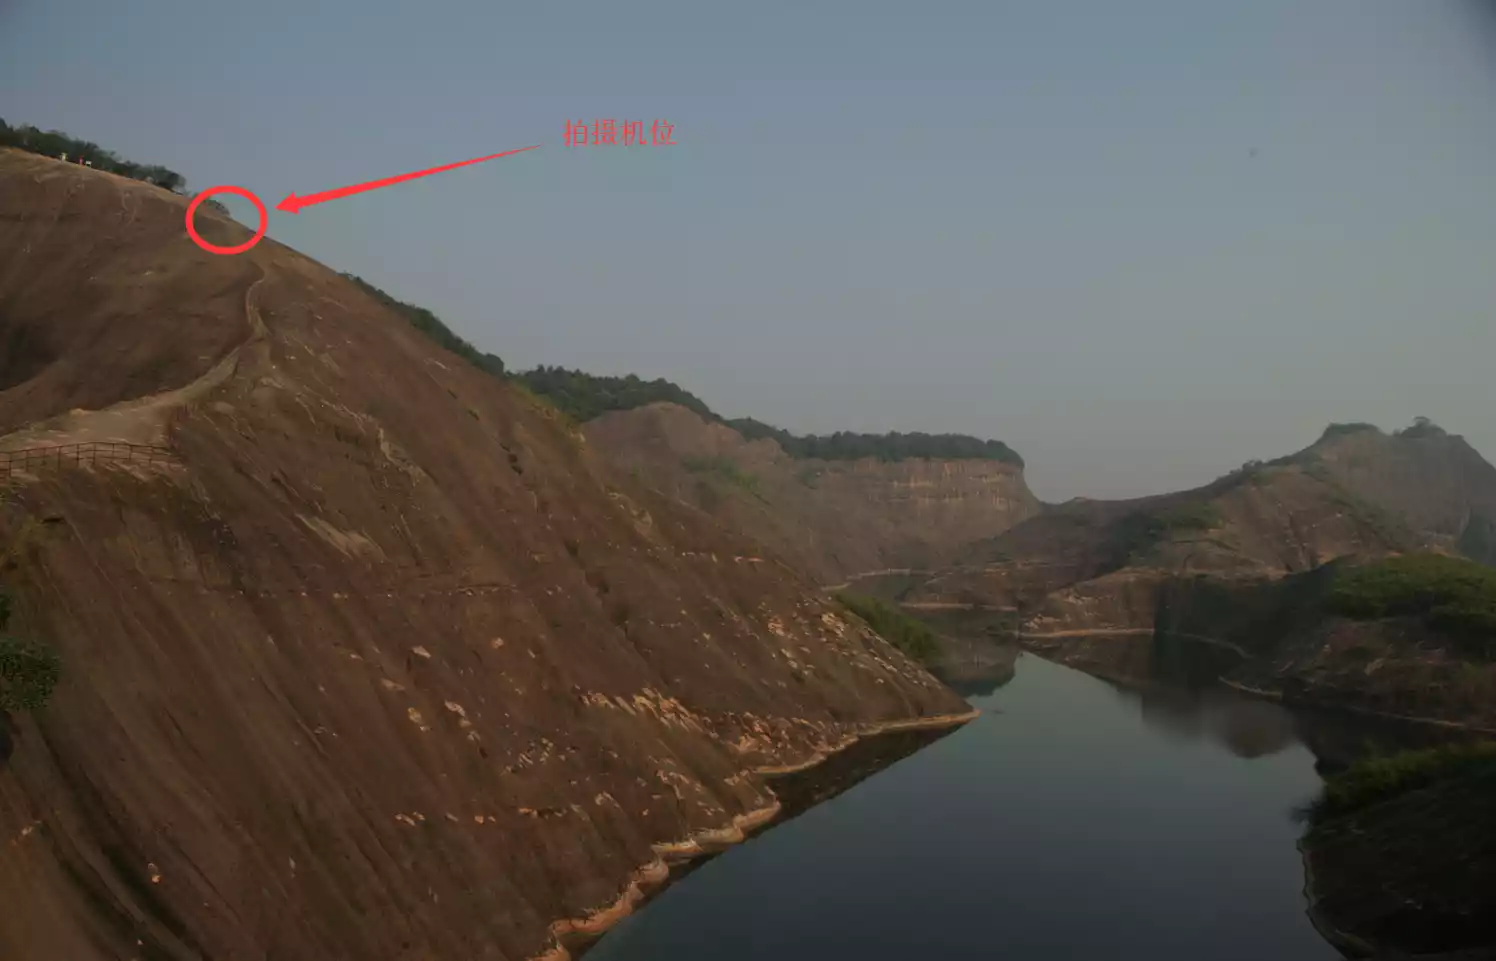
(Camera position)
The shooting position is on a high point with a relatively wide view above the opposite side, but there are steep slopes on both sides, and it is impossible to move around freely. Trying to use a 16mm focal length to shoot a panoramic view is still very difficult, so in order to make the panorama complete and impactful, the only solution is to use panoramic stitching. However, some students will have questions: Why not use a wider focal length for shooting stitching? It's very simple. Since you have chosen panoramic stitching, you only need to include the subject in the picture. Avoid excessive elements as much as possible to avoid wasting excess pixels, so that the subject can achieve larger pixels and clarity. So, in the end, after trying, I found that the 24mm visual angle is just right (reducing the influence of the bare sky and some stone walls at the bottom of the feet, making the subject of the shooting, the Giant Lizard Mountain, more obvious and prominent)
Post-Processing
Commonly used stitching software for post-production is the native stitching function of Camera Raw and Lightroom. Its advantage is that it can accurately identify the same elements between photos, align and stitch them through reasonable deformation and transformation, and automatically adjust slight differences in color temperature and hue between photos. (Often, we don’t set the white balance in the early stage of shooting, and the color tone of each photo after metering is also different. Simply using the automatic alignment function may lead to obvious stitching discontinuities, thereby increasing the work of post-production adjustments. Lightroom and Camera Raw can intelligently and automatically adjust the color temperature and hue before stitching to achieve a very natural effect.)
Okay, let me demonstrate the basic process of panoramic stitching.
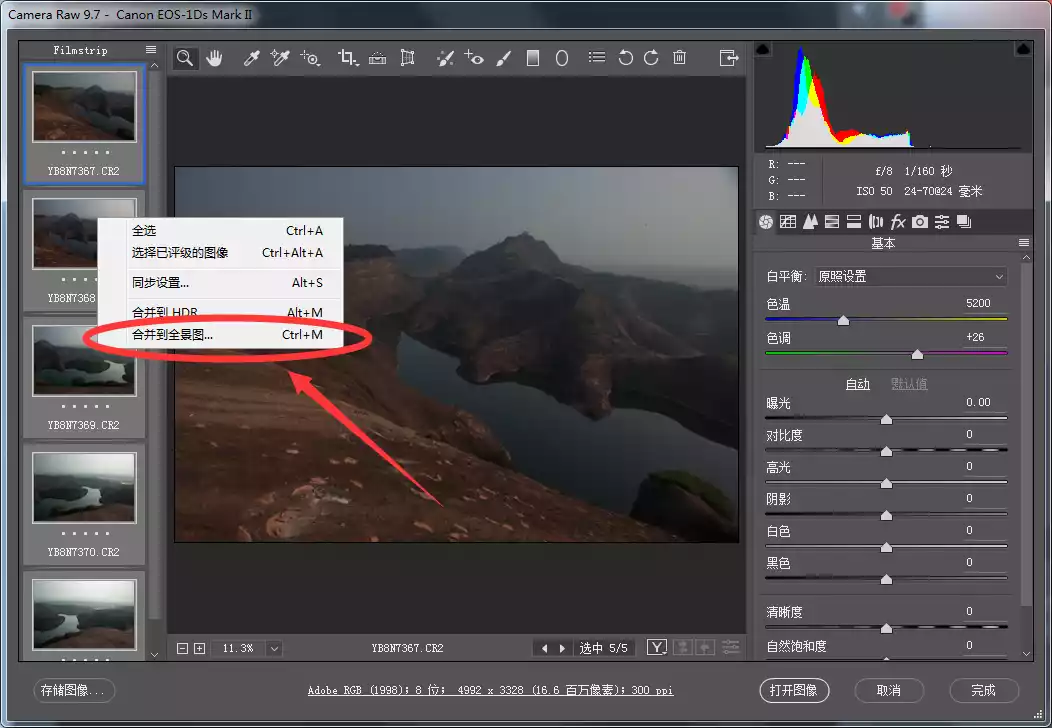
1. Find the photos you want to stitch (in raw format), select all of them, and drag them into Photoshop.
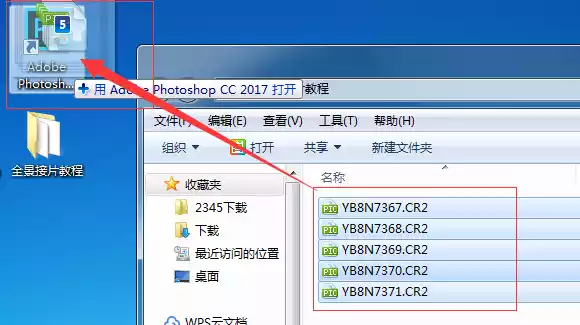
2. When you open a raw format photo in Photoshop, the camera raw plug-in will be automatically started. The left side shows the list of all imported photos.

3. Press Ctrl+left key to select all photos, right-click and select "Merge into Panorama", and wait for the software to automatically align and stitch
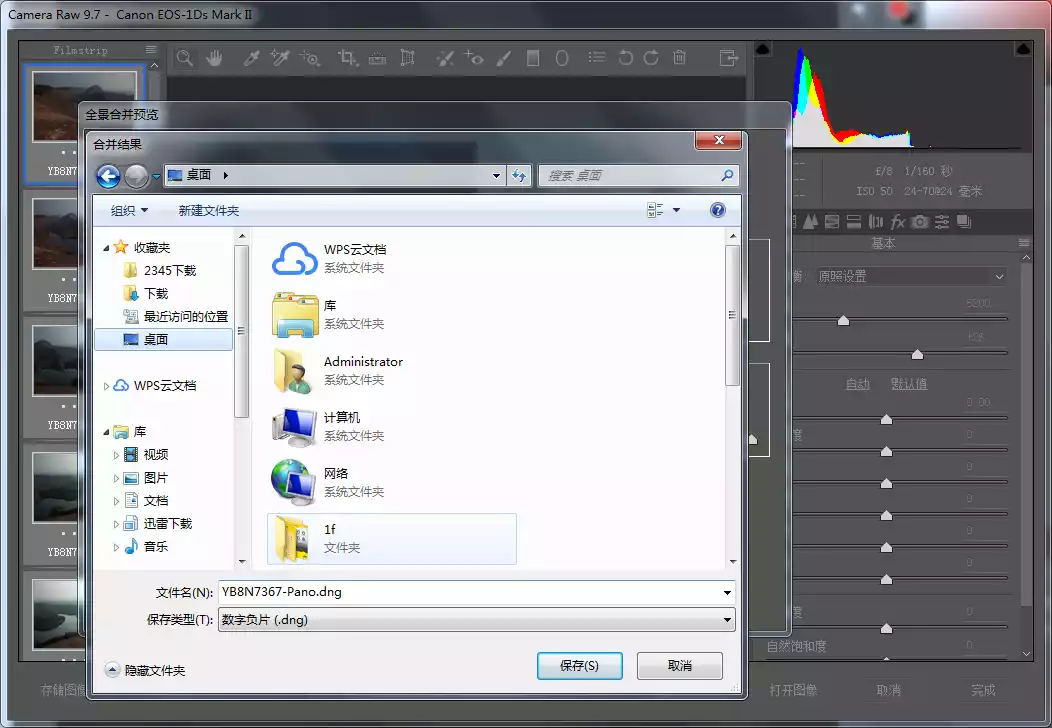
4. After the software automatically stitches, the "Panorama Merge Preview" window will pop up. Select "Spherical", "Auto Crop", and drag the border deformation (by slightly deforming the border pixels to include more pixels, reducing unnecessary cropping and wasting pixels. This function is mostly used for natural scenery. Use it with caution on photos with buildings or people to avoid causing distortion that is inconsistent with reality) to the appropriate parameters and press "Merge".

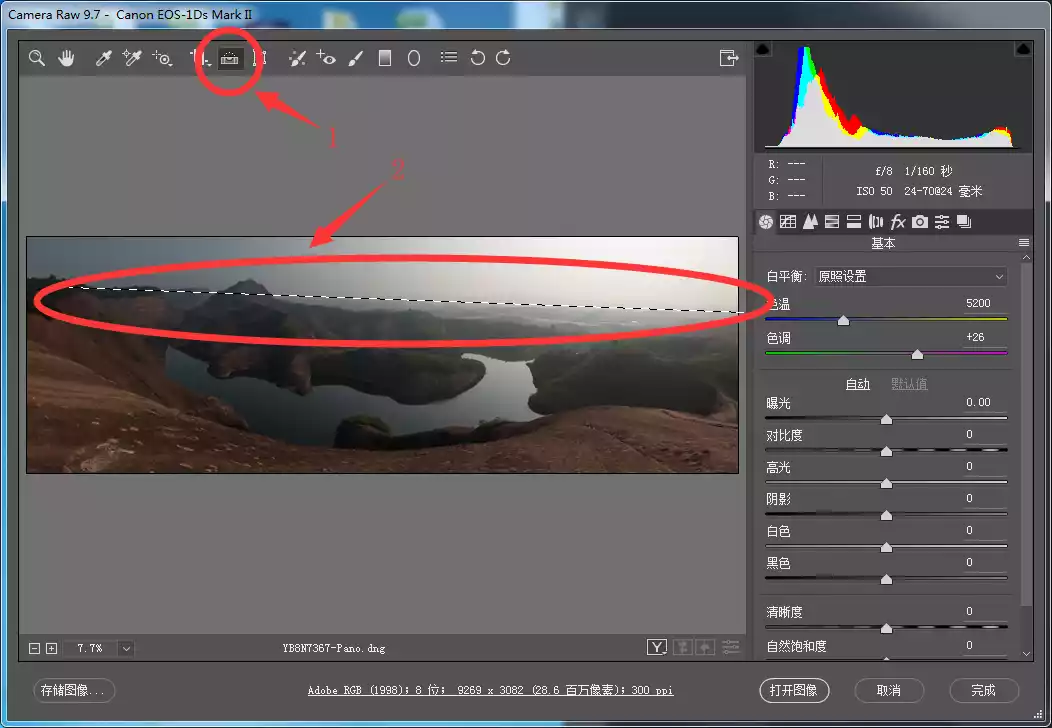
6. The stitched panorama often has the problem of uneven horizontal lines (because the stitched pieces are too long and it is difficult to ensure that each photo is strictly horizontal). We can use the straightening tool as shown in the figure to draw a straight line where it should be horizontal (the place where it should be horizontal in this picture is the skyline). Press Enter to confirm. The panorama will be automatically horizontalized and cropped.
7. At this point, the post-production process of the panoramic stitching is completed. The following will show you how to perform post-production editing on this panoramic image.
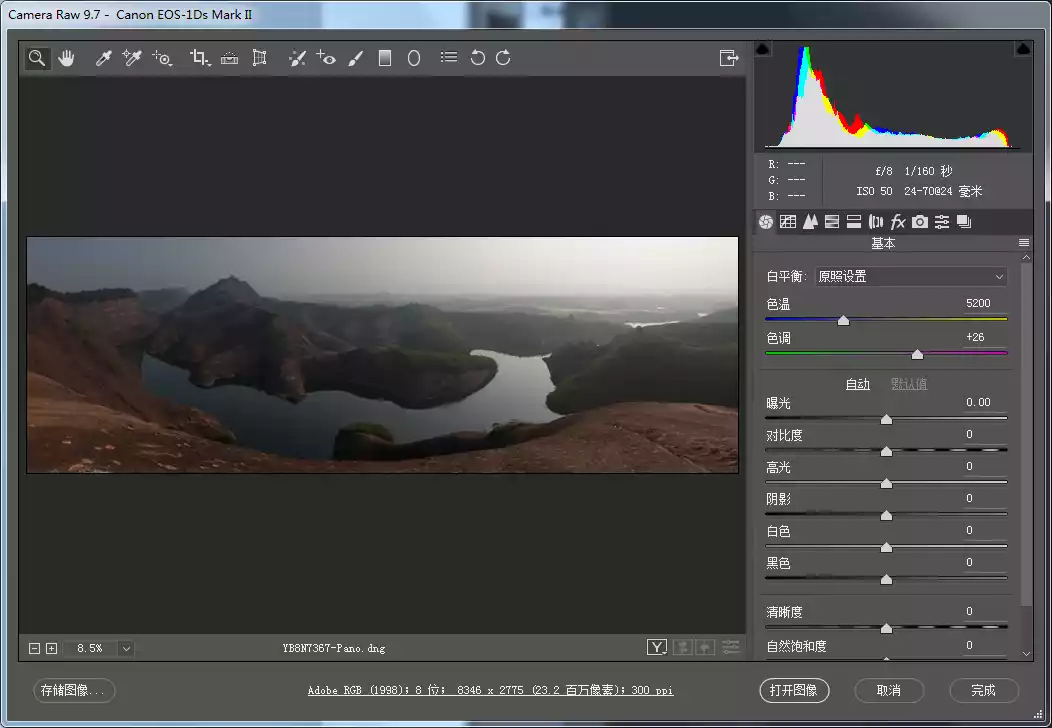
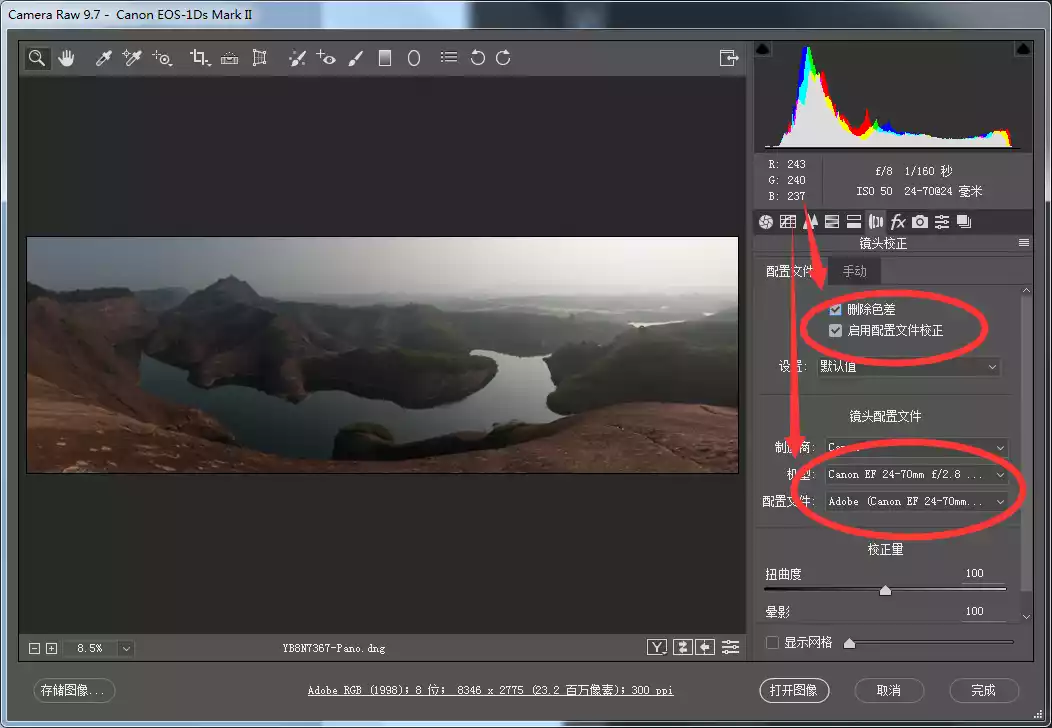
8. First, correct and remove lens distortion and chromatic aberration (purple and green edges)
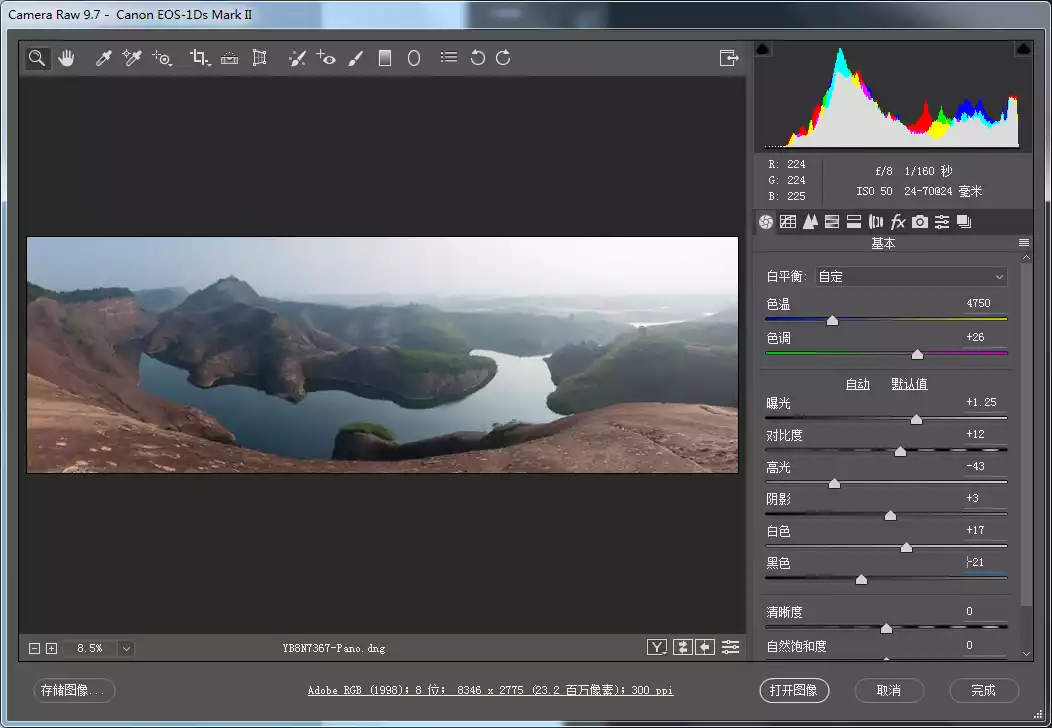
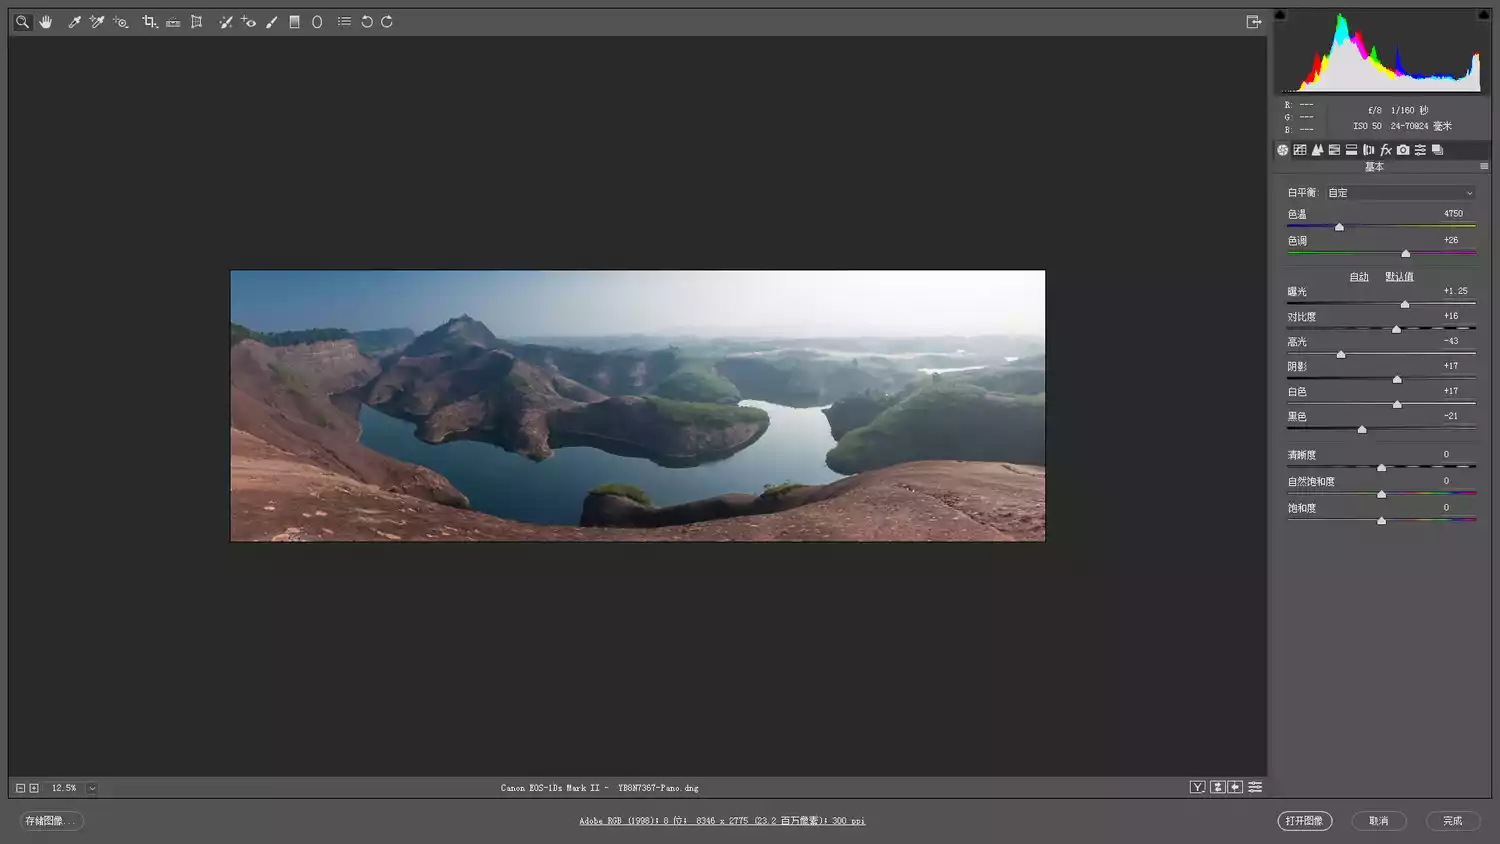
9. Analyze the problems in the photo (such as the above picture, the overall exposure is slightly underexposed, the color temperature is warm and dirty, and it is not transparent enough, etc.), and adjust the basic parameters in the "Basic" column as follows
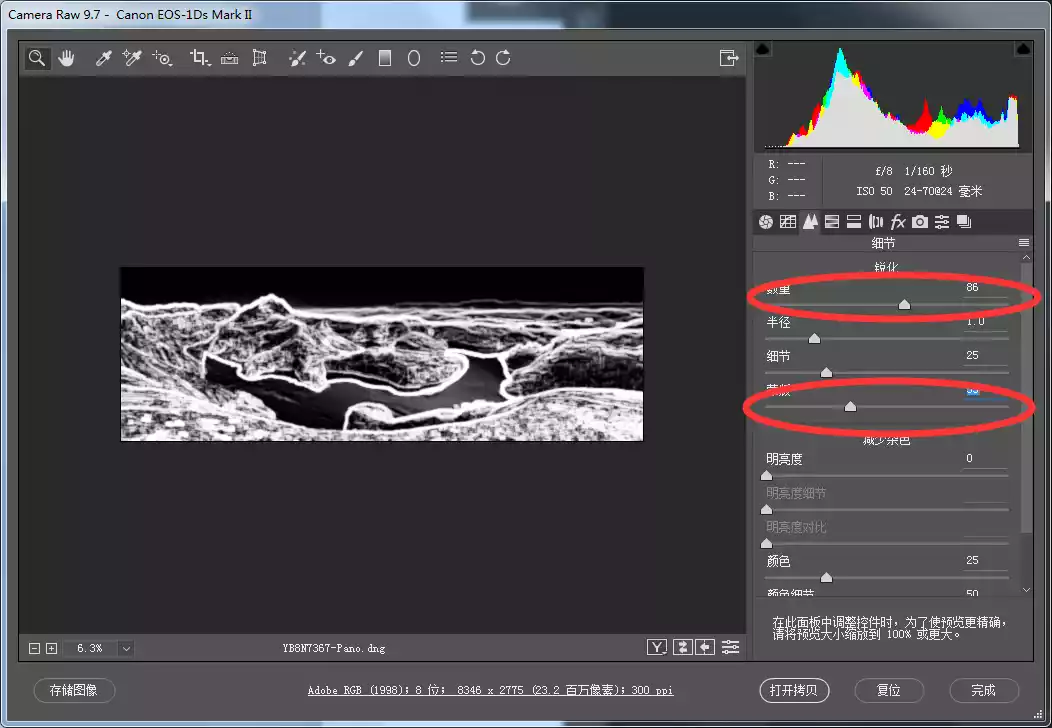
10. Sharpen and reduce noise in the "Detail" column (hold down Alt and drag the "Mask" bar in the Sharpen column to observe the white outline (the sharpening area is a reminder). Only sharpen the edges that need sharpening. The "Reduce Noise" column can be left unchanged because there is no obvious noise in this image)
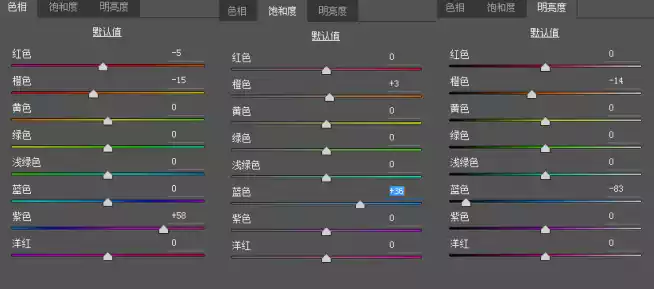
11. Fine-tune the color and adjust the overall color in the "HSL Grayscale" column. Adjust the following color parameters as shown in the figure
12. After adjusting the above parameters, we can get the photo effect as shown in the figure. Continue to observe the problems that need to be adjusted (the sky light ratio is unbalanced and the saturation changes too much, making the overall picture a little dirty).
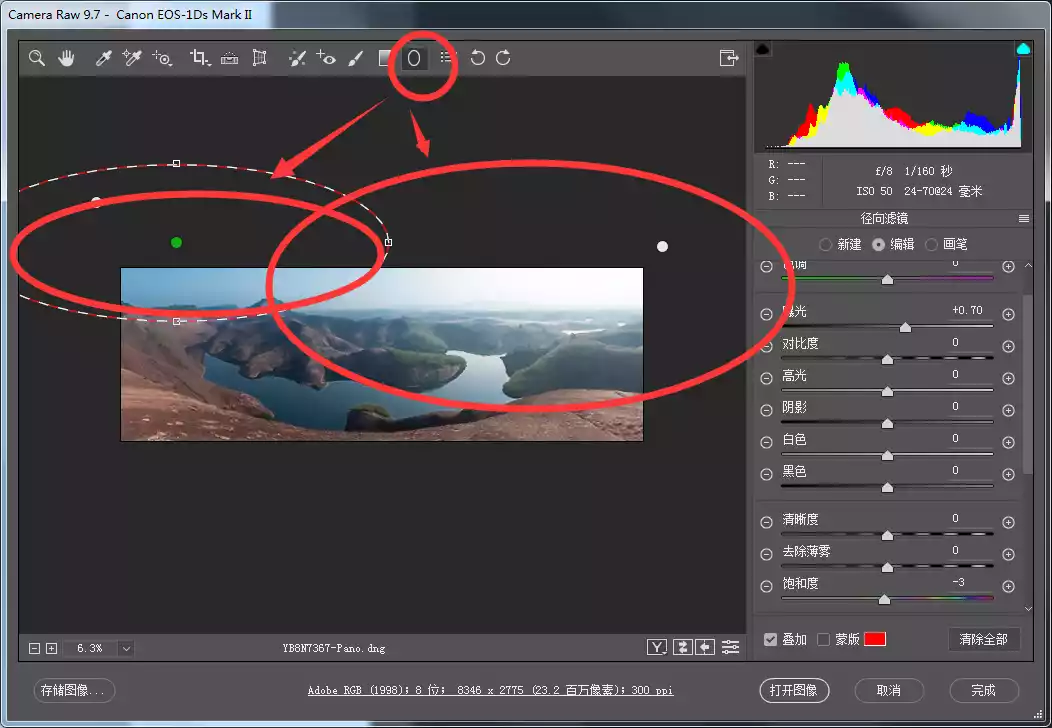
13. Use the "Radial Filter" to adjust the brightness and saturation of the sky area as shown in the figure, and balance the sky saturation and light ratio. At this step, we can press "Open Image" in the lower right corner to export and save it in PS.
After reading this, don’t you think that retouching a photo is not difficult at all if you find the right method? Let’s lay a solid foundation and become a qualified photo retoucher!
[Statement] We are committed to protecting the content of every original creator, but because some pictures and texts come from various channels such as the Internet, we cannot trace the author. If there is any infringement, please contact us to delete it.