Solving the dilemma of optimal light - Sky and Earth Splicing
Climb stairs to get some fresh air or change the weather
Preface
When we are beginners and start reading photography textbooks, we will read something like this: "The golden light time for photography is half an hour before and after sunrise and sunset."
If we are going to the rooftop with a few good friends to drink ice cola and chat, it would be better to go before sunset.
But if we are going to shoot climbing works, we have to consider issues such as lighting, picture composition, and camera position. The best way is to save excellent climbing works, scout the location in advance, make adequate preparations, and choose a day with explosive weather to set off.
In this issue, we will mainly talk about the following problem: climbing photography will fall into such a dilemma: the best time for the sky is half an hour before sunset, when the clouds begin to be dyed with golden rays of light; and the best time for the landscape is half an hour after sunset, when the city lights light up and the tracks take shape.
In order to perfectly present the sky and landscape in one work, synthesis is required.
How to get a perfect stair climbing photo
You can do this
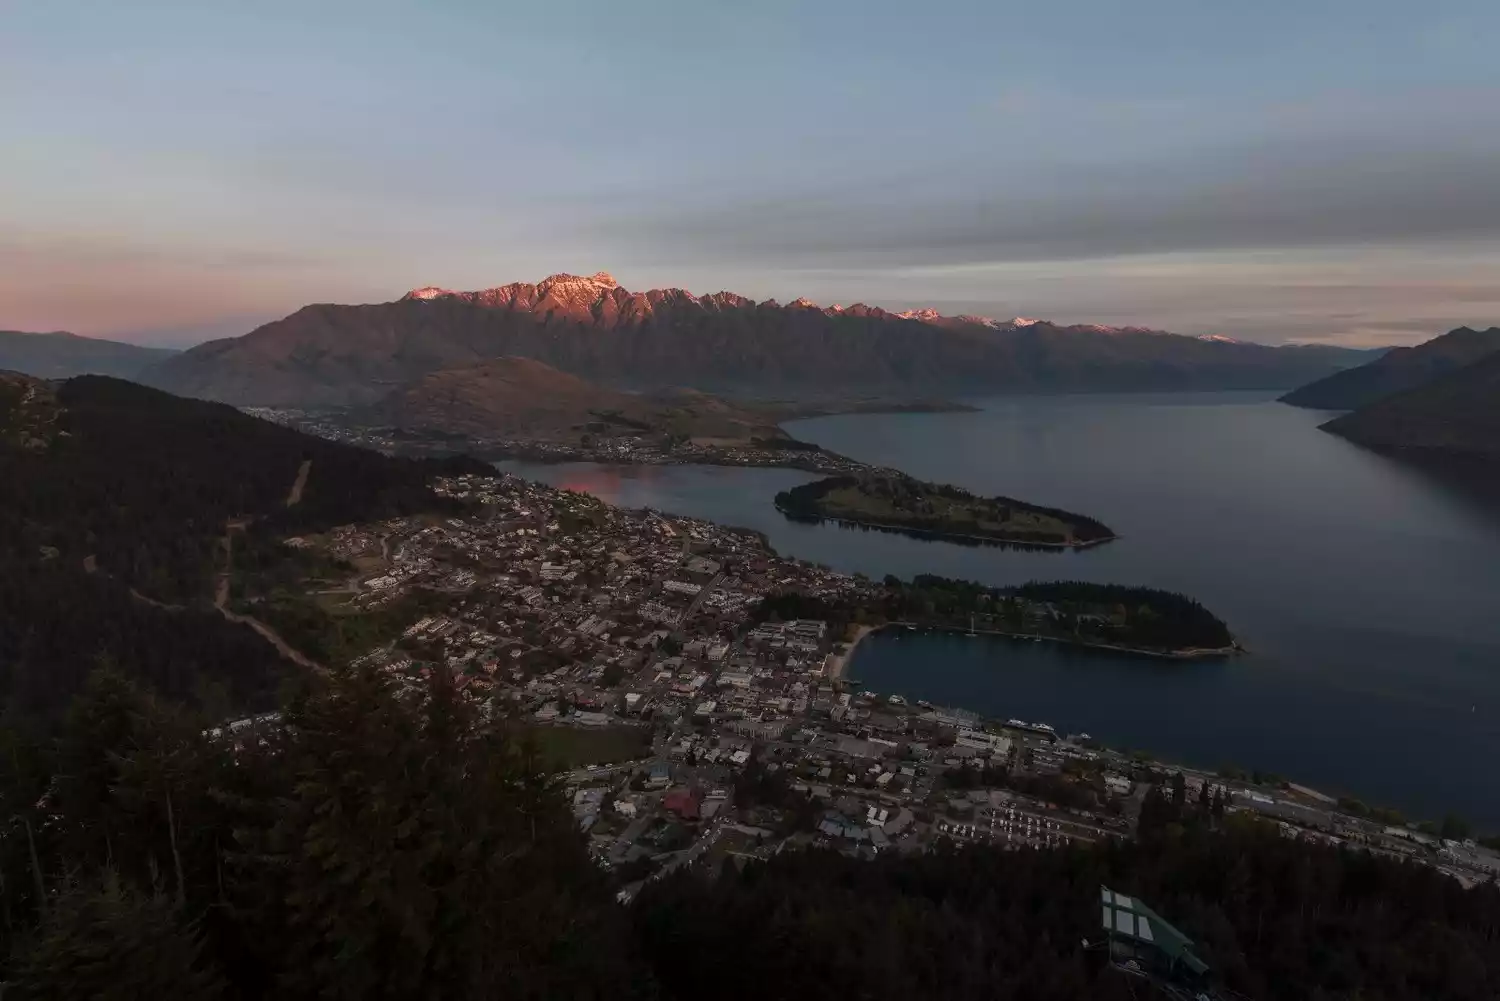
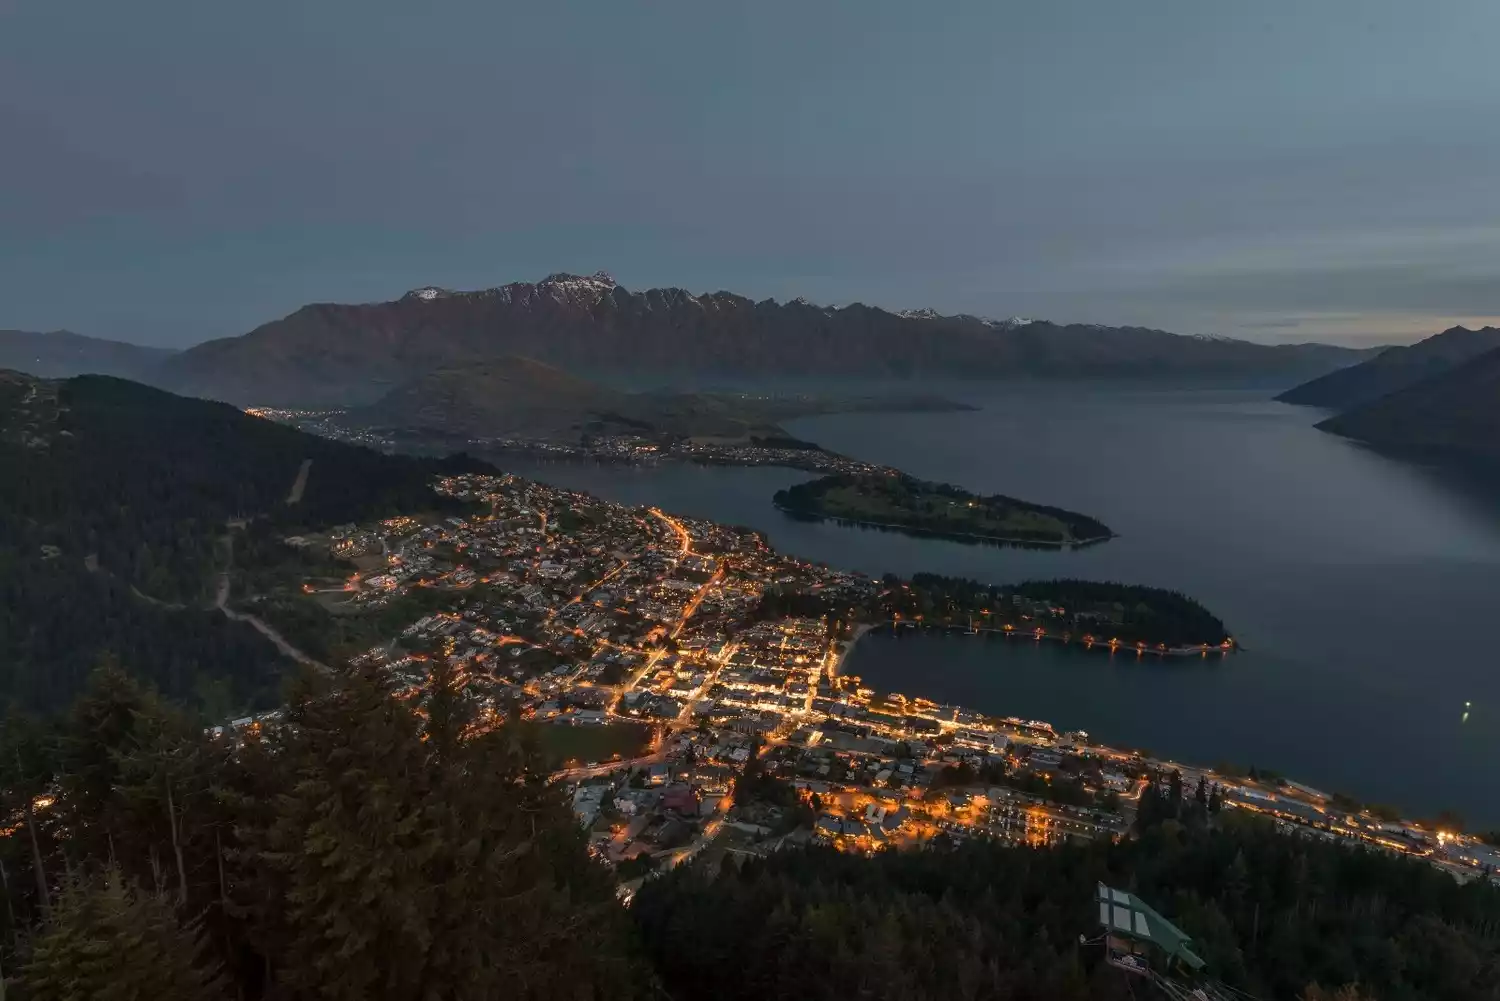
The two pictures above were taken last year in Queenstown, New Zealand, from the Gondola viewing platform.
The former was taken at 7:30 pm, the latter at 8:30 pm. It's obvious that neither photo looks good individually; there's always a noticeable flaw in some part of the image, making it appear flat and lacking in color. So, I chose to combine the most aesthetically pleasing parts of each image into a single frame. The final result is shown below.

(Photo by Ding Yifeng)
Post-production natural synthesis techniques
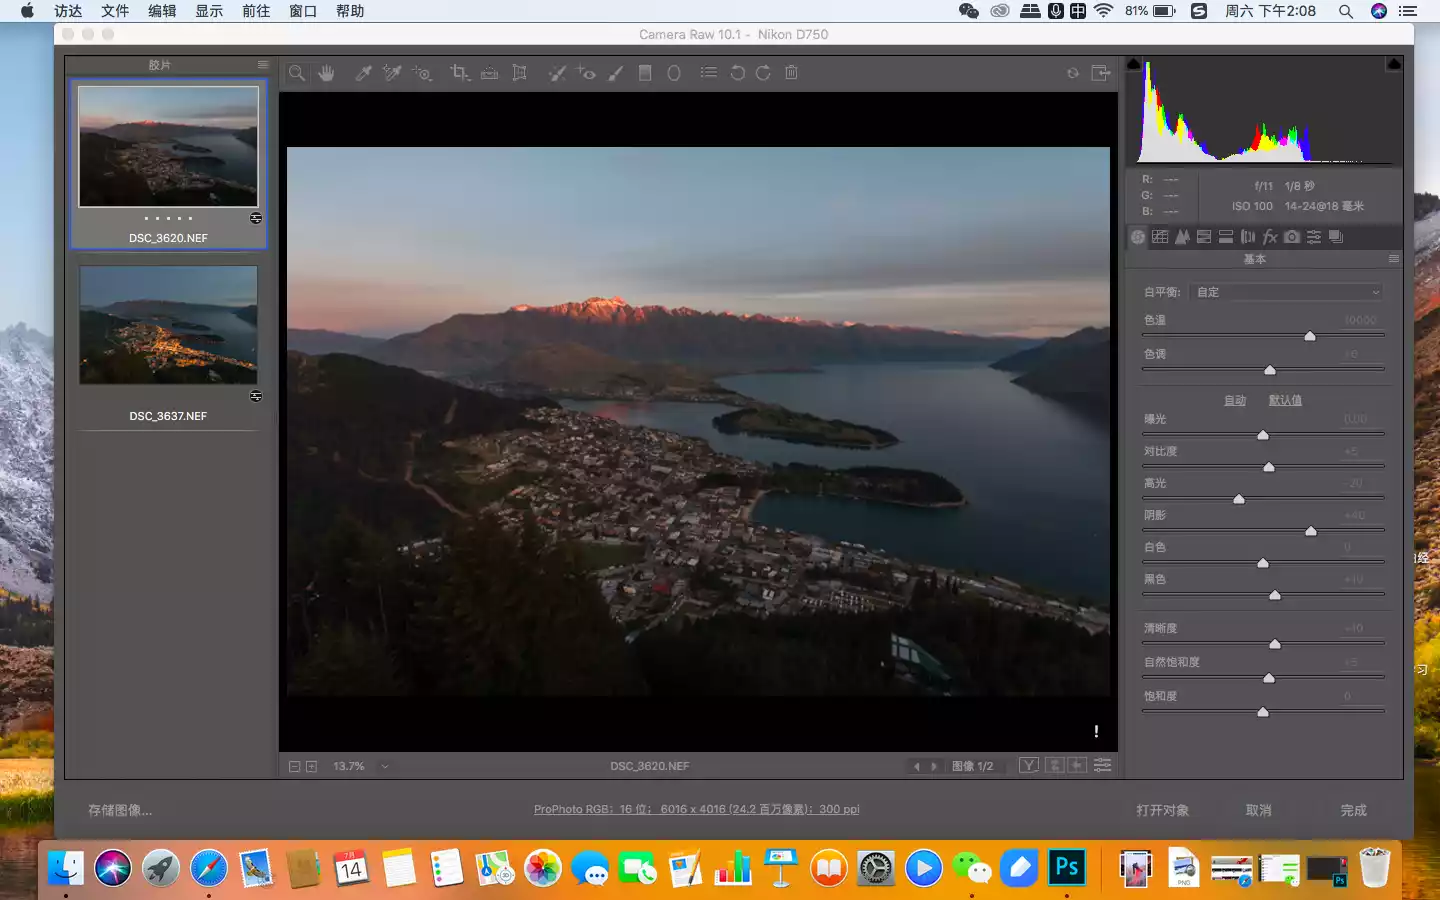
Import acr interface
Next, I will introduce my synthesis process in detail and some tips to pay attention to.
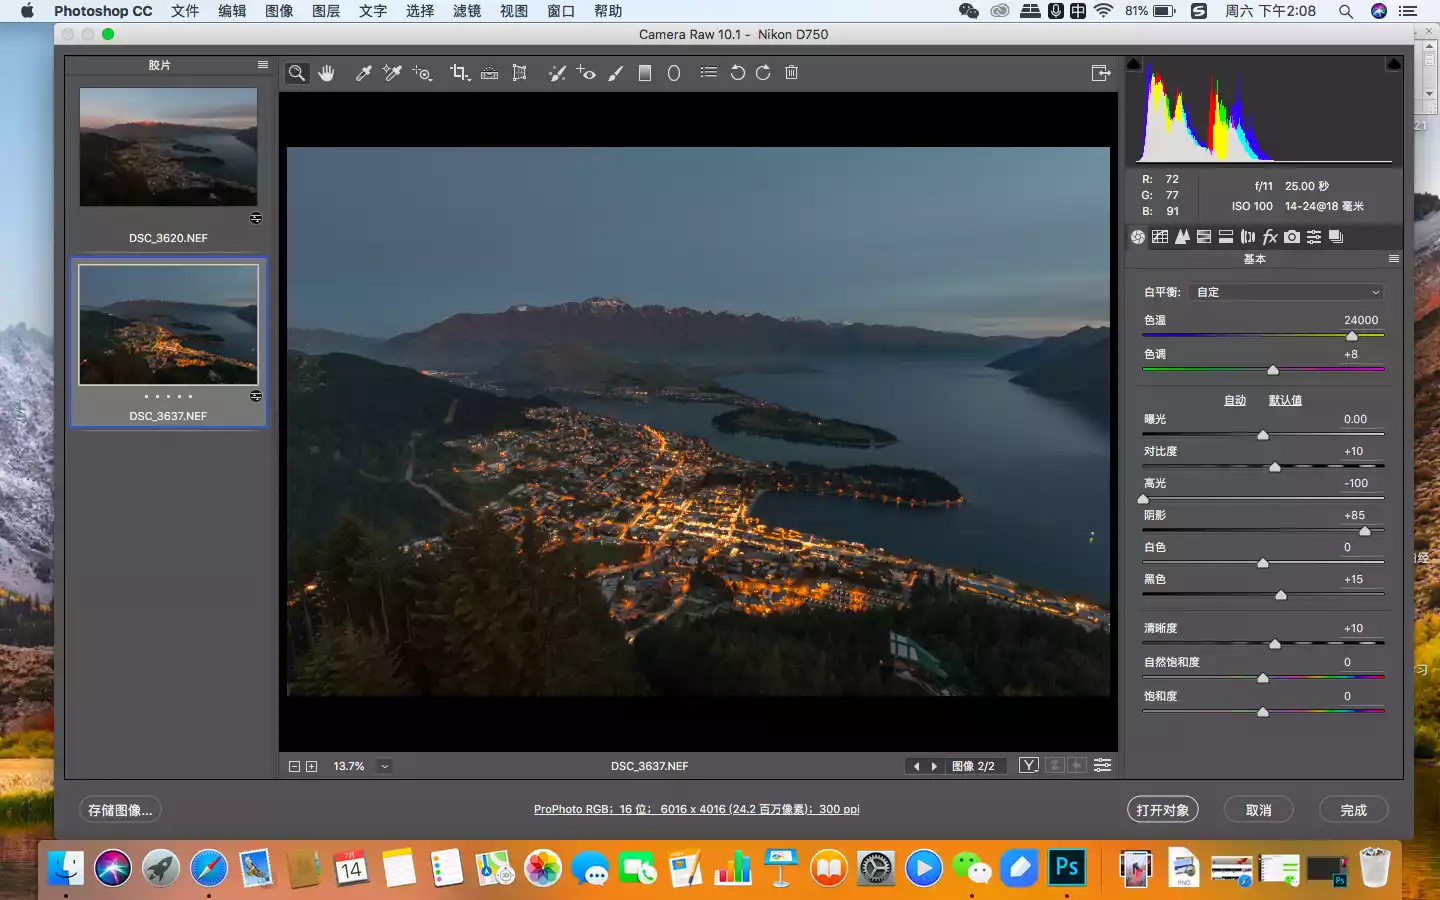
First, import the two photos in RAW format into ACR. In the ACR interface, adjust the color temperature, hue, highlights, shadows and other parameters of the photos. I want to emphasize that there is no need to force the color temperature of the two photos you plan to combine to be the same, which is a common mistake made by many novices.
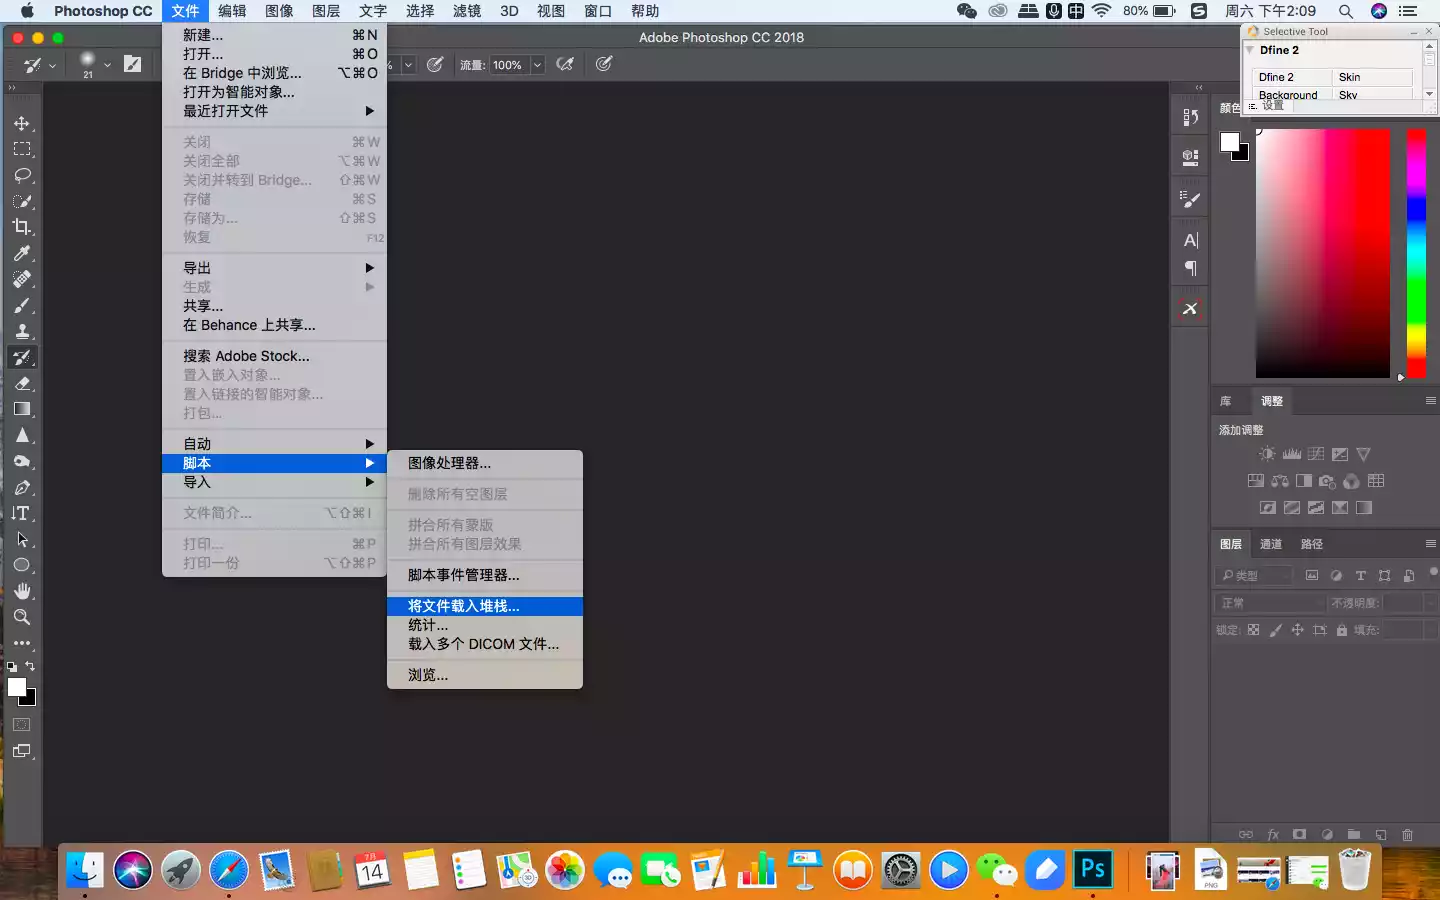
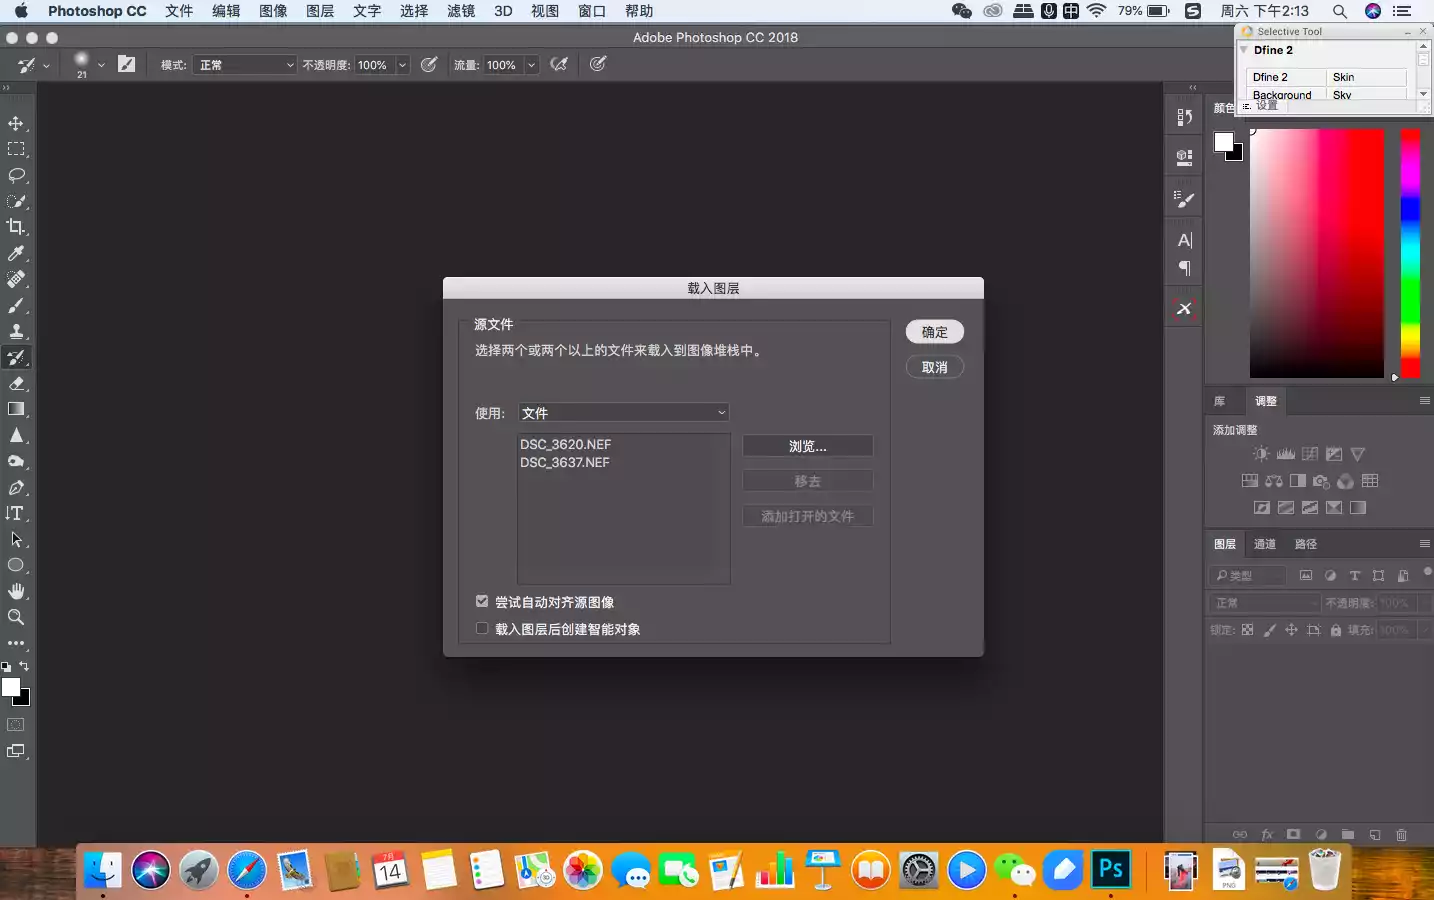
Stacking photos
Next, I imported the two photos into a stack. It's important to note that the two photos were taken an hour apart, and I was standing on a busy viewing platform, so slight tripod shaking was inevitable. Therefore, please make sure to check "Auto Align."
After importing, I started to observe the photos and found that the photo above we wanted was only the lights and tracks, which were relatively bright. Then we could use the brightness masking technology to select the area and select the brighter part as the highlight channel. I used the Starstail plug-in to create the brightness channel first.
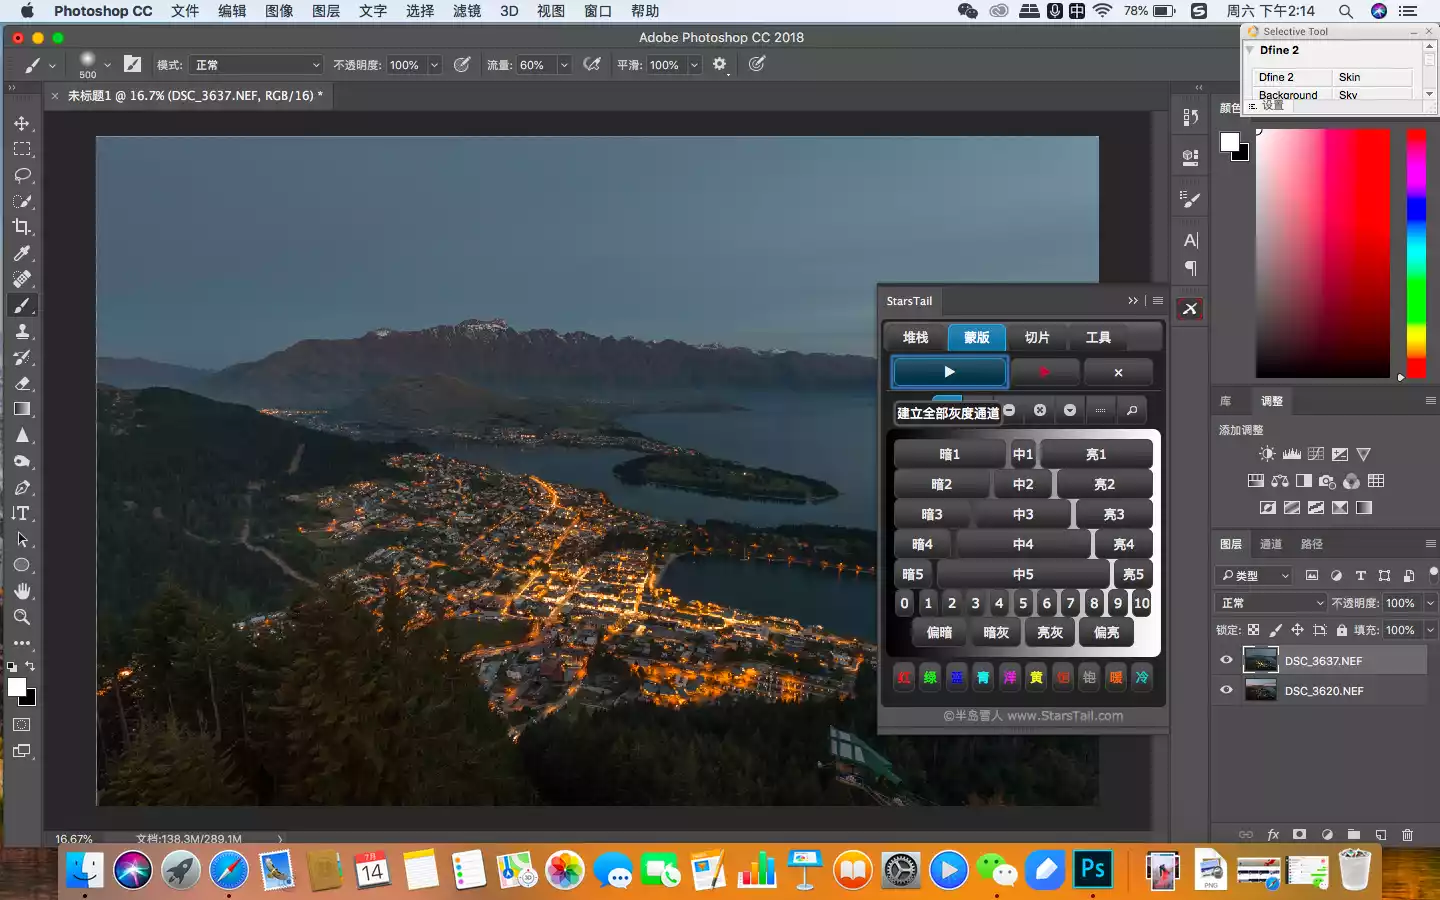

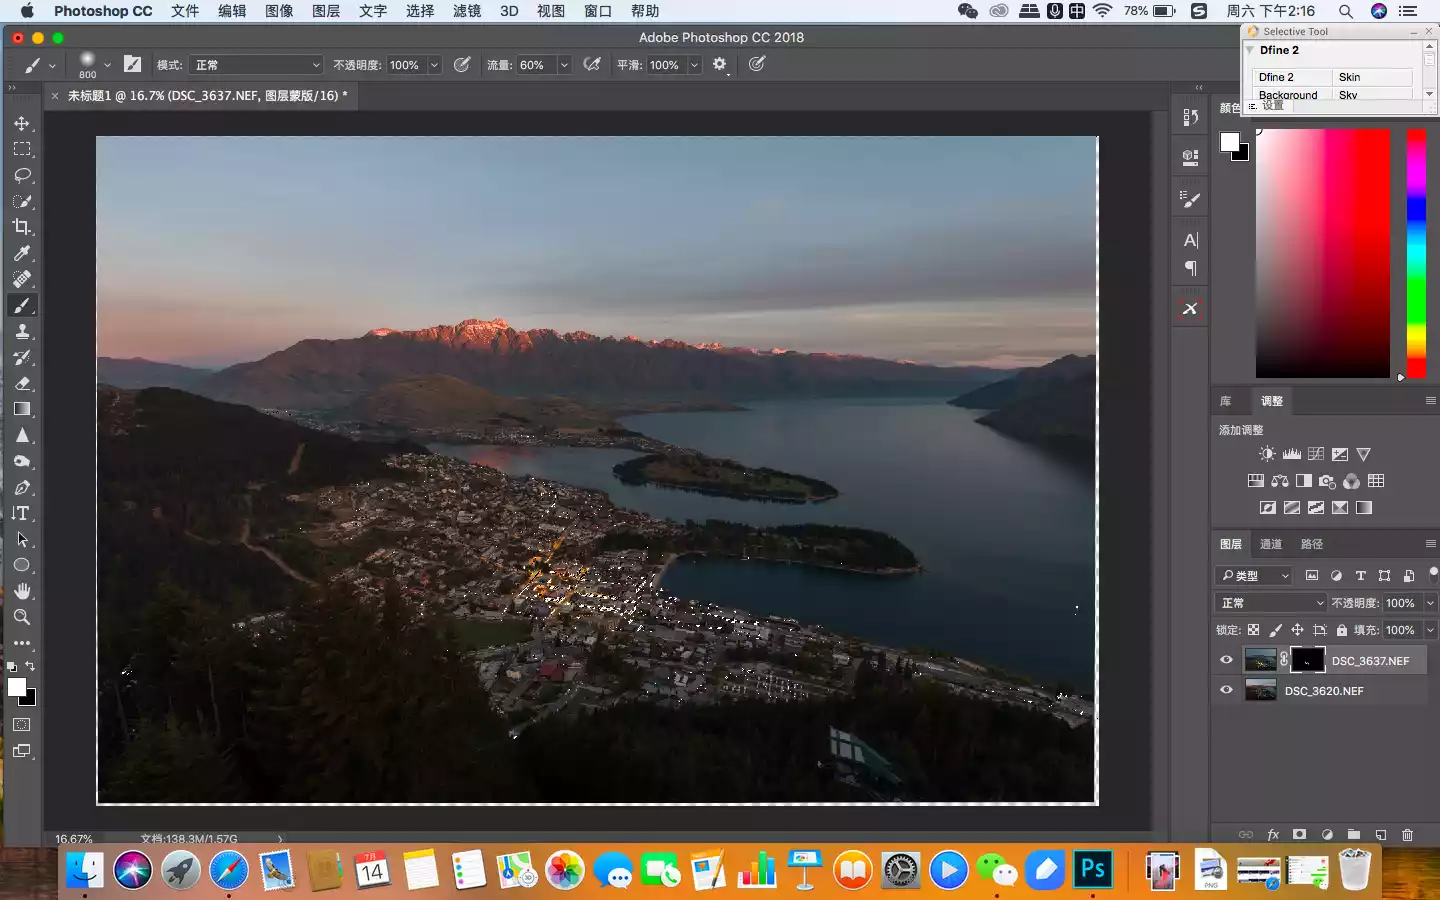
Next, return to the Layers interface and create an inverse mask. You'll see that the entire night scene has disappeared. Since we only want the lights and train tracks, our next task is to carefully erase them while protecting the channel selection.

The following two pictures show me erasing the mask. I automatically selected the highlights through the channel selection, and then used the brush tool to paint on the mask.
Tips:
There are also techniques for applying the brightness mask, which mainly involves using a low-concentration brush tool to apply it layer by layer. This ensures that the mask effect is transitional and avoids distortion caused by sudden changes in painting style.
The most important thing is that with the channel selection protected, the brush will only affect the content within the highlight selection when you apply it! This is the core meaning of the luminosity mask. You must read the tutorial and try it yourself to feel the convenience of this technique.

Merge the two layers together, and you'll see that our goal of achieving the optimal lighting for both the sky and the landscape is essentially complete. Next, we'll work on the details we're after to enhance the texture.
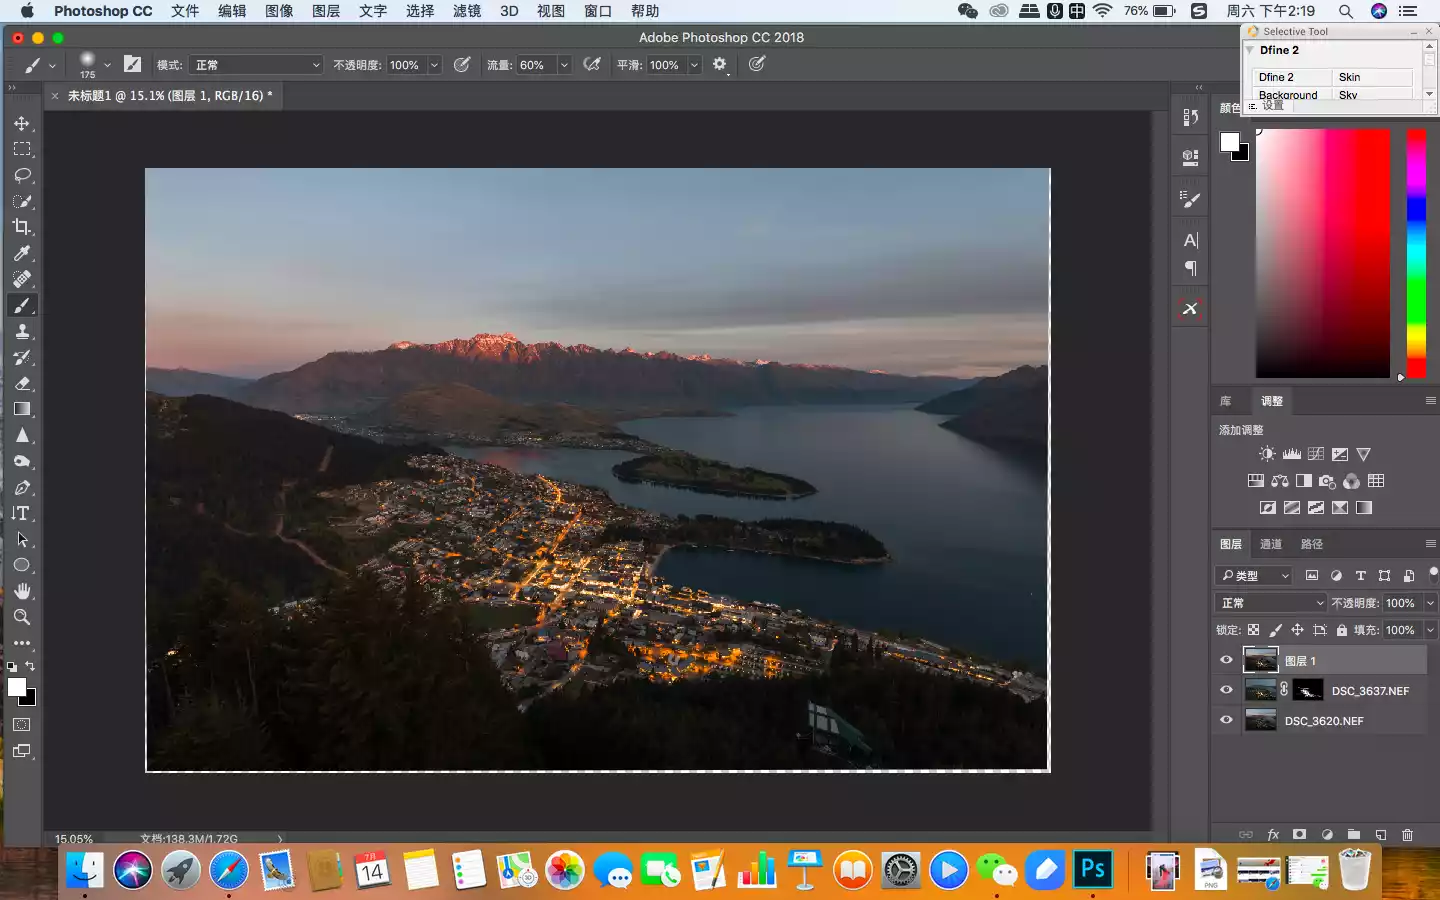
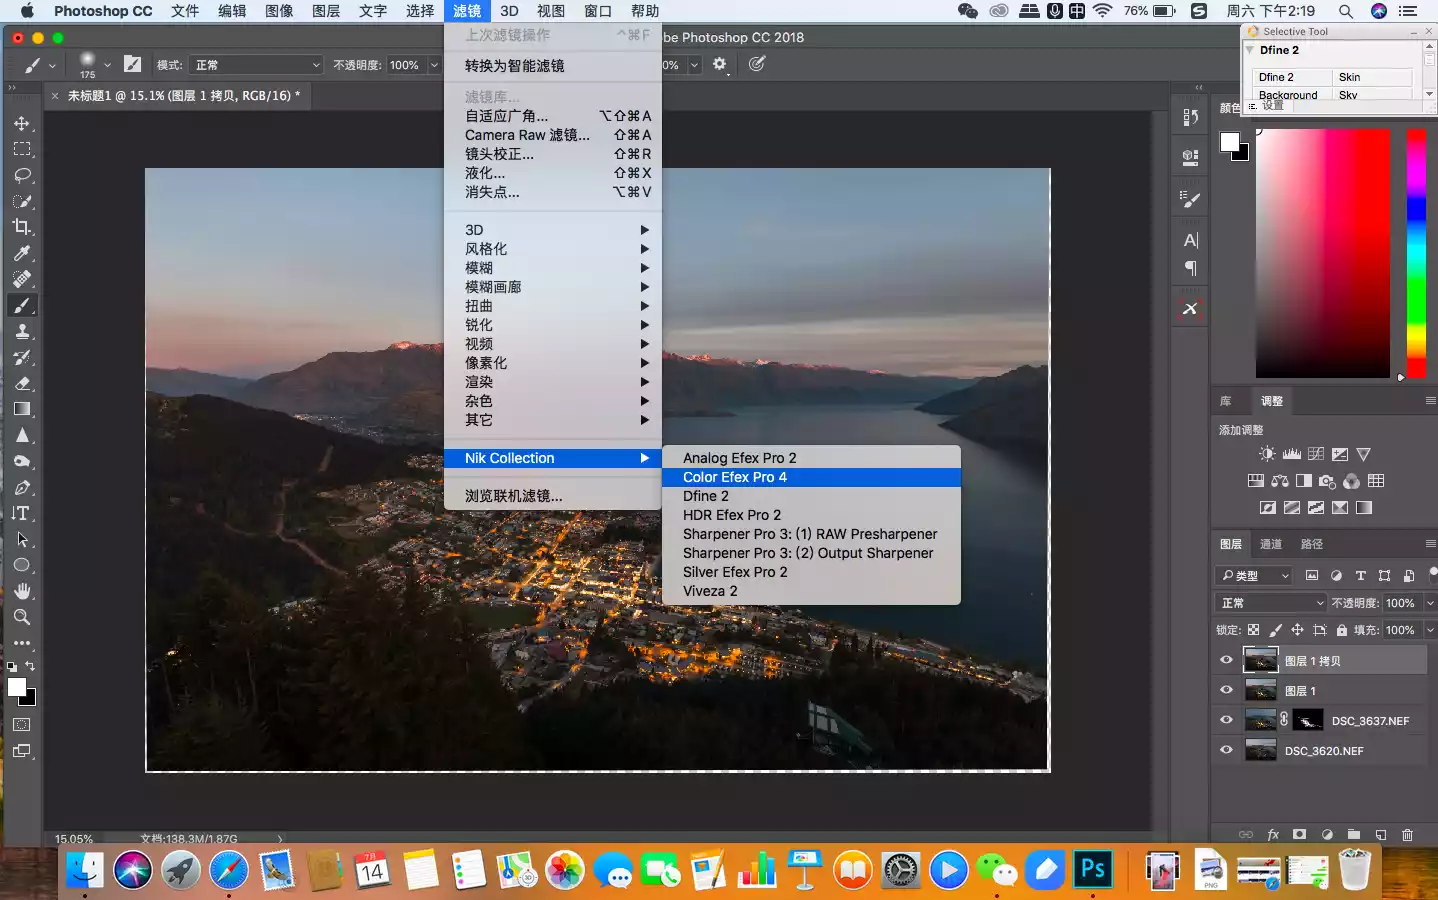
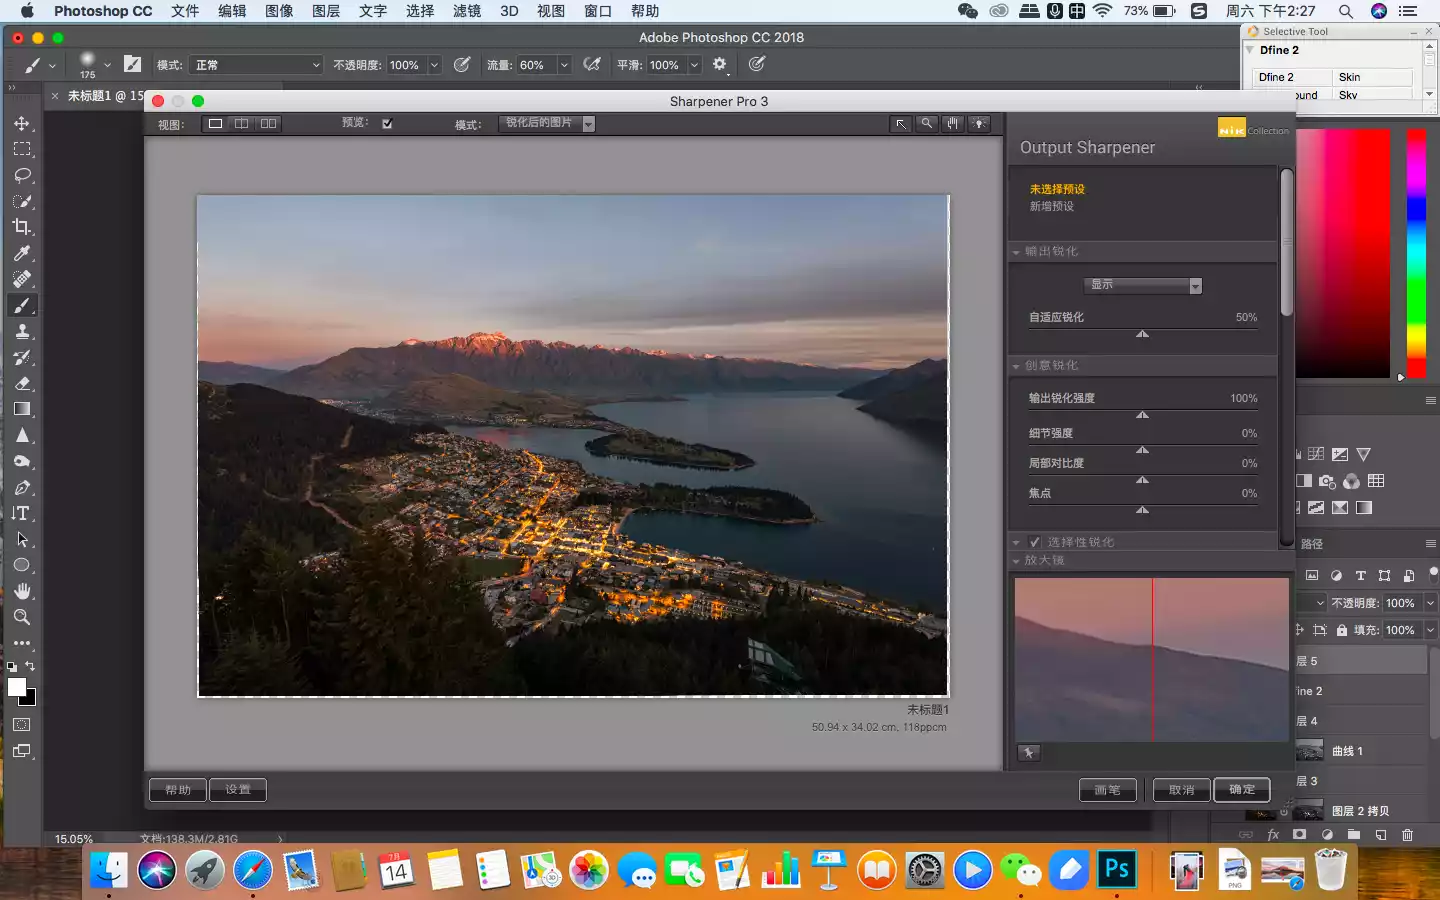
Here I still use Google's Nik Collection filter system - Color Efex Pro filter plug-in.
Tips:
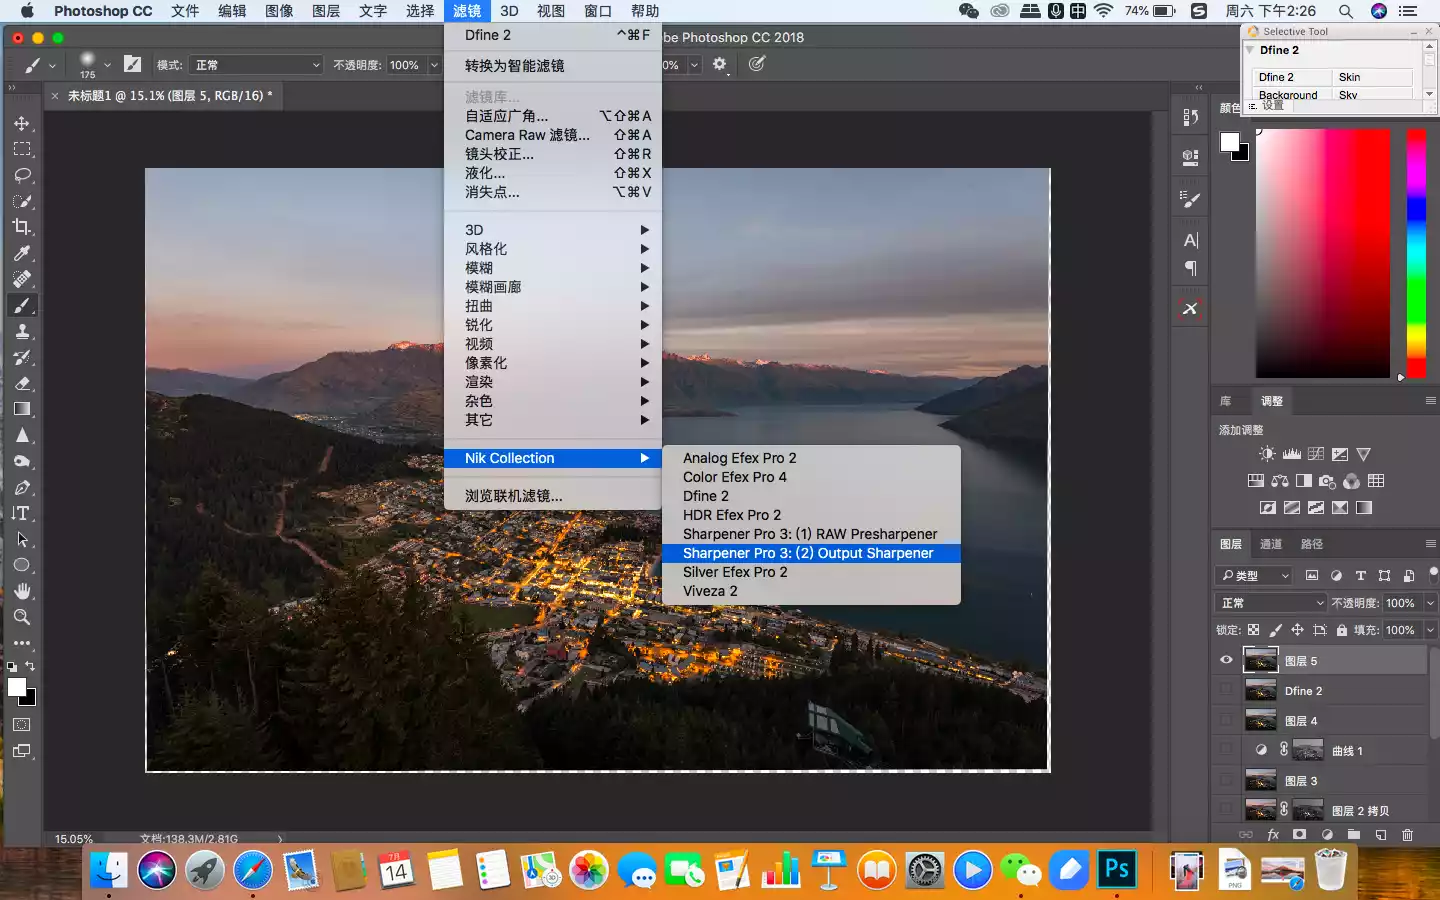
Nik Collection is a free filter system developed by Google. Commonly used ones are Efex Pro (adjust color and brightness), Dfine 2 (noise reduction), Sharpener (sharpening), etc.
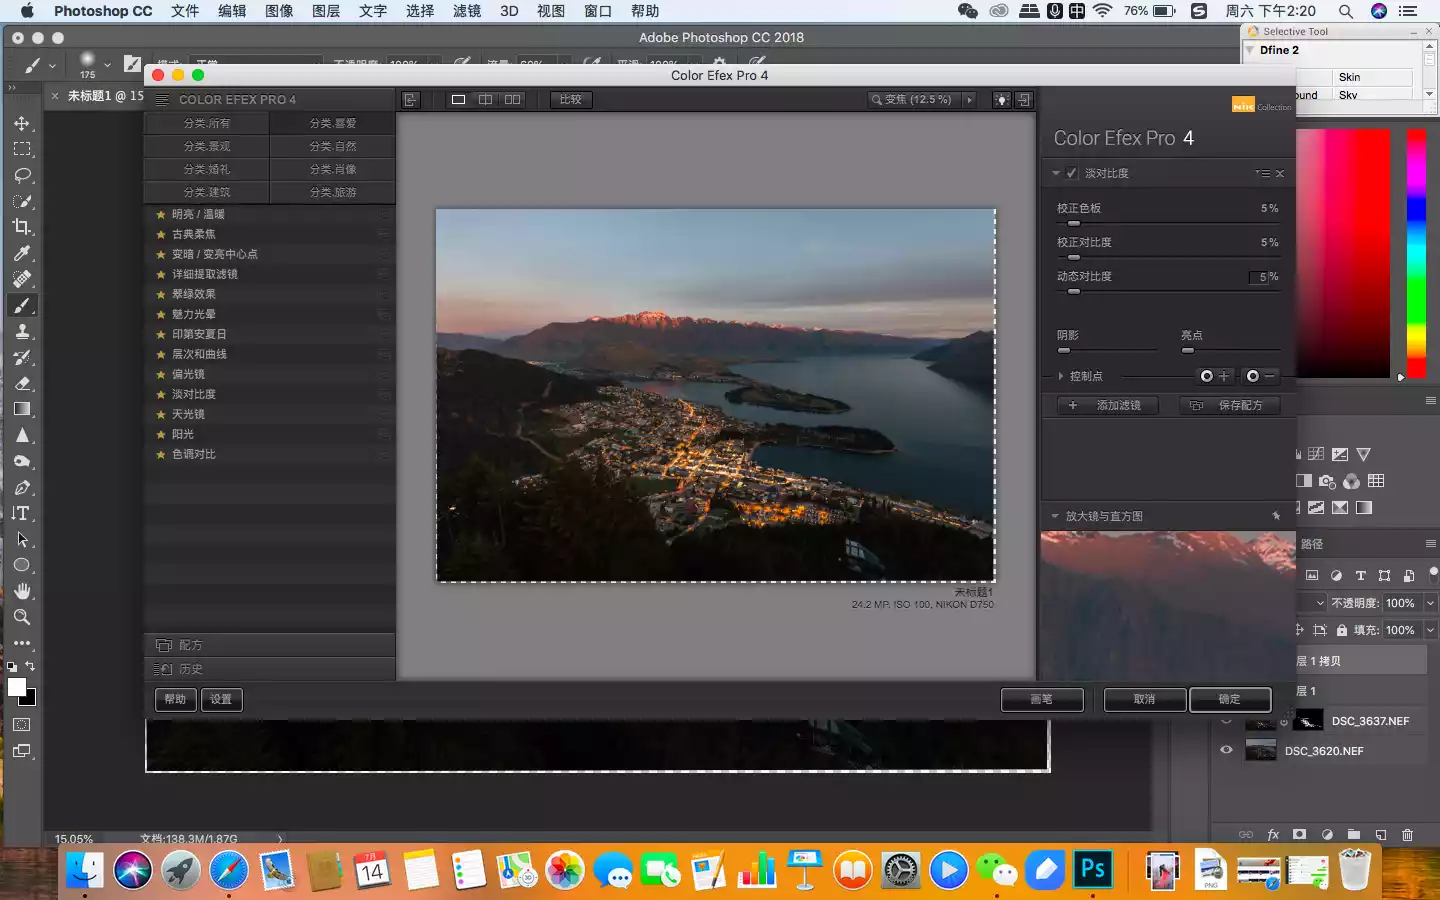
First, "Light Contrast" is used to initially improve the overall image quality. For a simple setting, all three parameters are set to 5. This way, there's no risk of color fading in the sky, so you don't need to worry about using masks. (I'll cover techniques for creating and avoiding color fading in future tutorials. For now, the main point is that large expanses of clear sky are prone to color fading. This photo clearly doesn't have a clear sky, so there's no need to worry.)
Next, use "Tonal Contrast" to enhance the texture of the key areas. This filter is easy to overdo, so the parameters are generally adjusted to a lower value first.
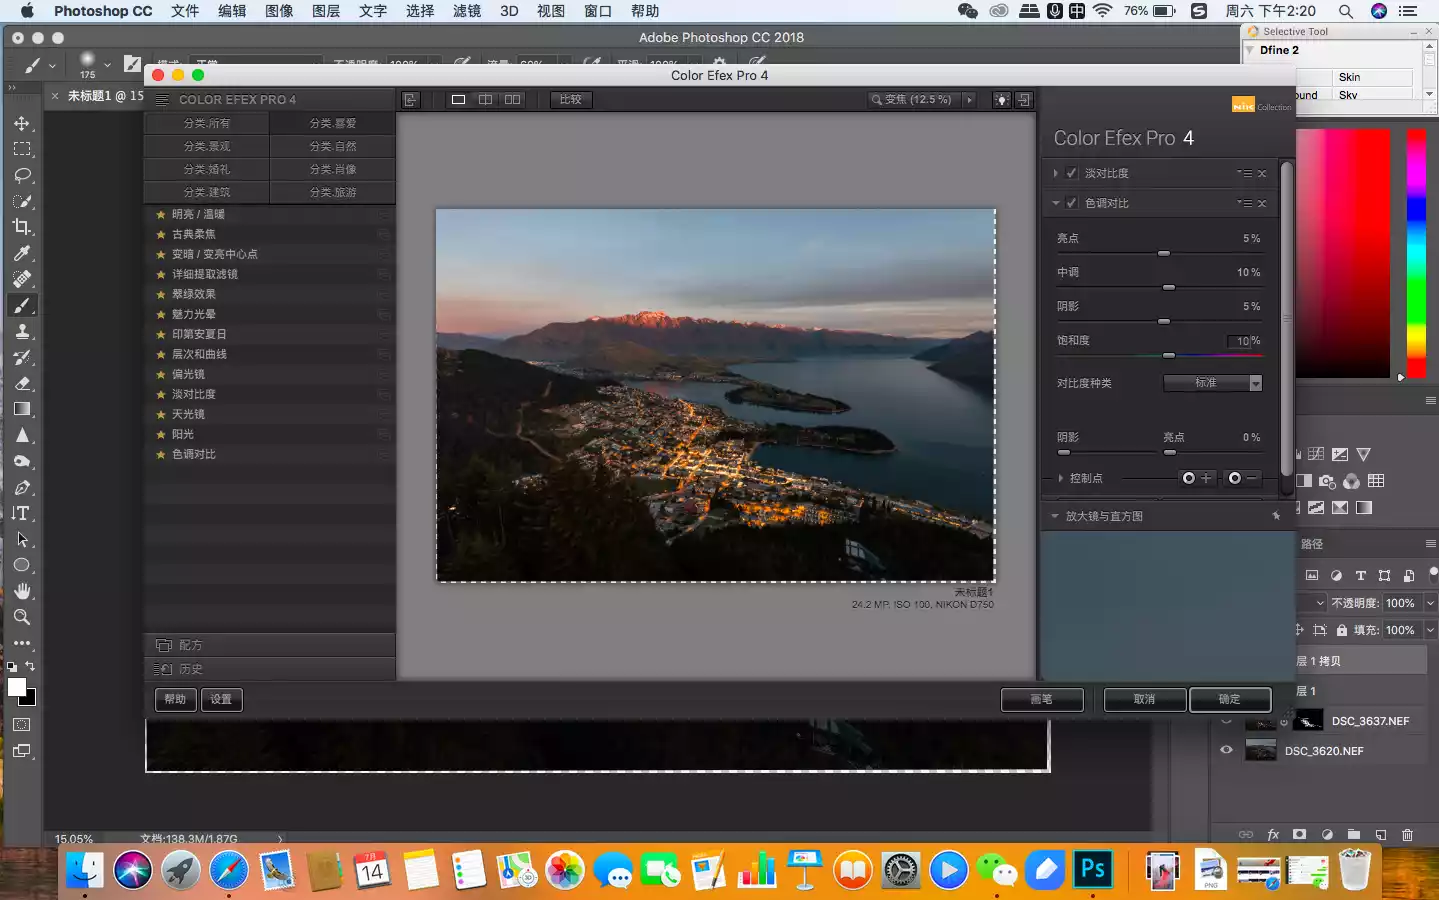
In this picture, the areas that need to be enhanced are the buildings in the town and the snow-capped mountains in the distance, so I used the mask function of the filter's automatic recognition to select them.

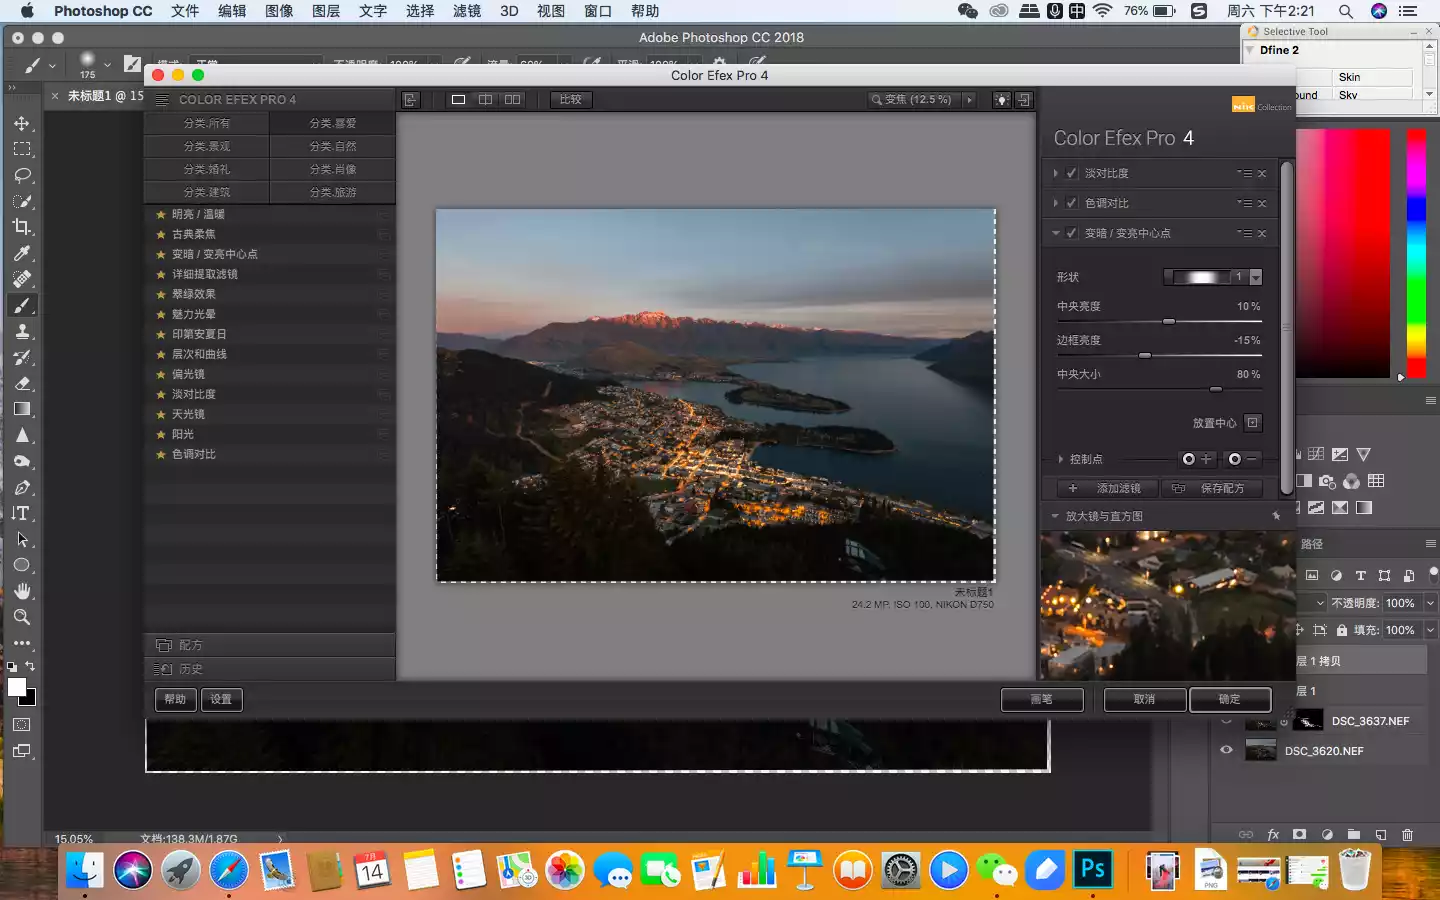
In order to highlight the center of gravity, there is also a very useful filter called "Darken and Brighten Center Point". Just put the cross in the center on the town buildings. It can reshape the light and shadow, so that everyone's vision is more layered and focused on the center of gravity.
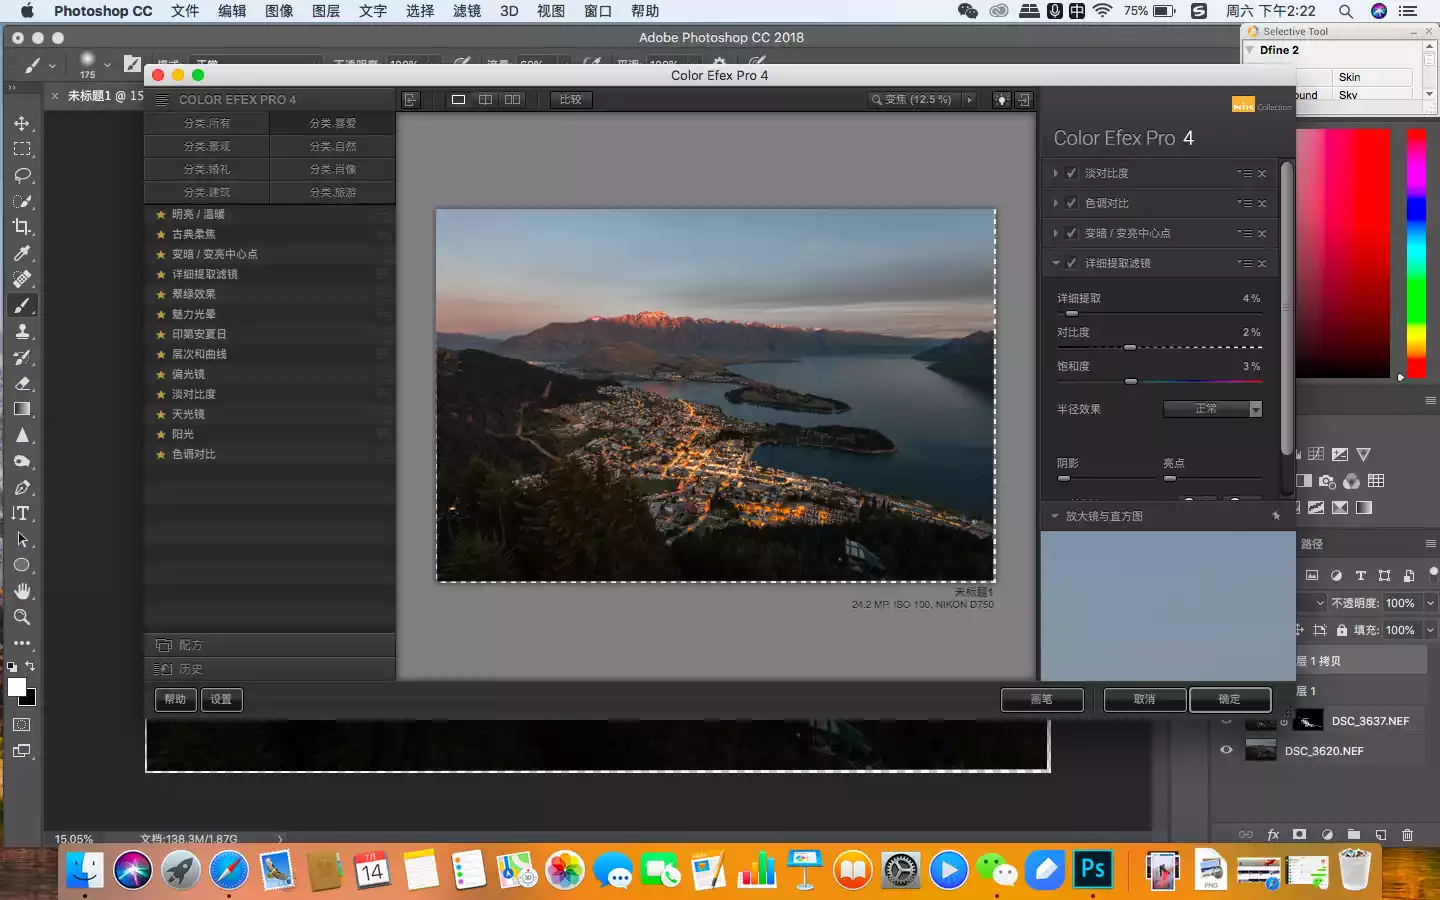
I observed the area again and felt that the details in the dark areas of the forest were not very clear. I could have used a Curves mask to improve it, but in the Efex interface, there is a more useful filter called the "Detailed Extraction Filter". It can maintain the image quality while improving the details.
Tips:
The core of the detailed extraction filter is to automatically identify dark areas and restore details while maintaining image quality. Compared with brightening with curve masks, it is more intelligent.
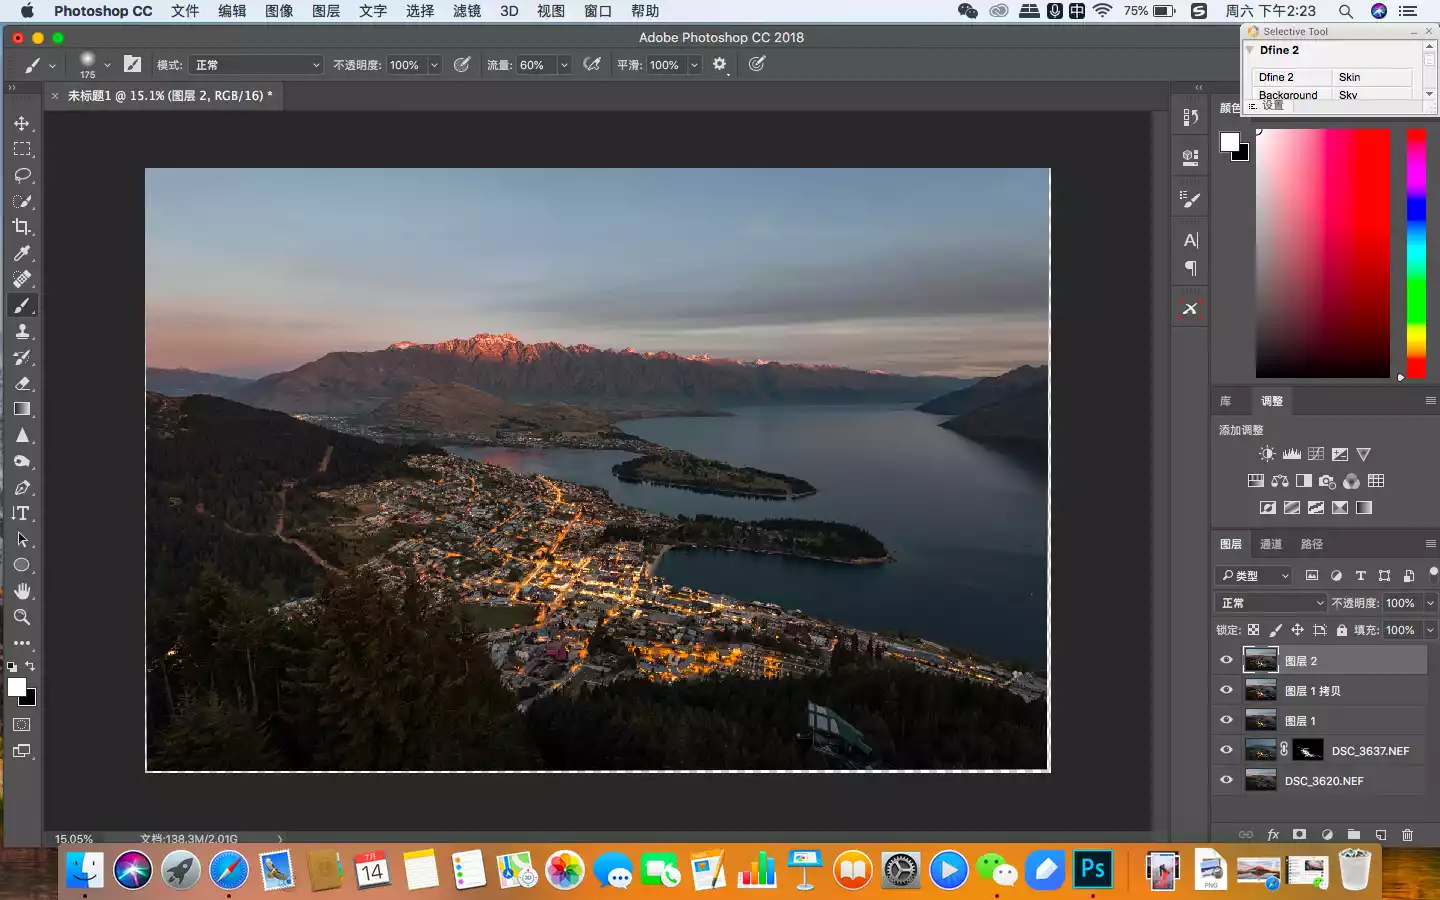
Then click OK and return to the Photoshop interface. We can see that at this point, the image quality has been significantly improved compared to the beginning. Landscape photography is like this, constantly relying on the accumulation of small steps to achieve the final qualitative change.
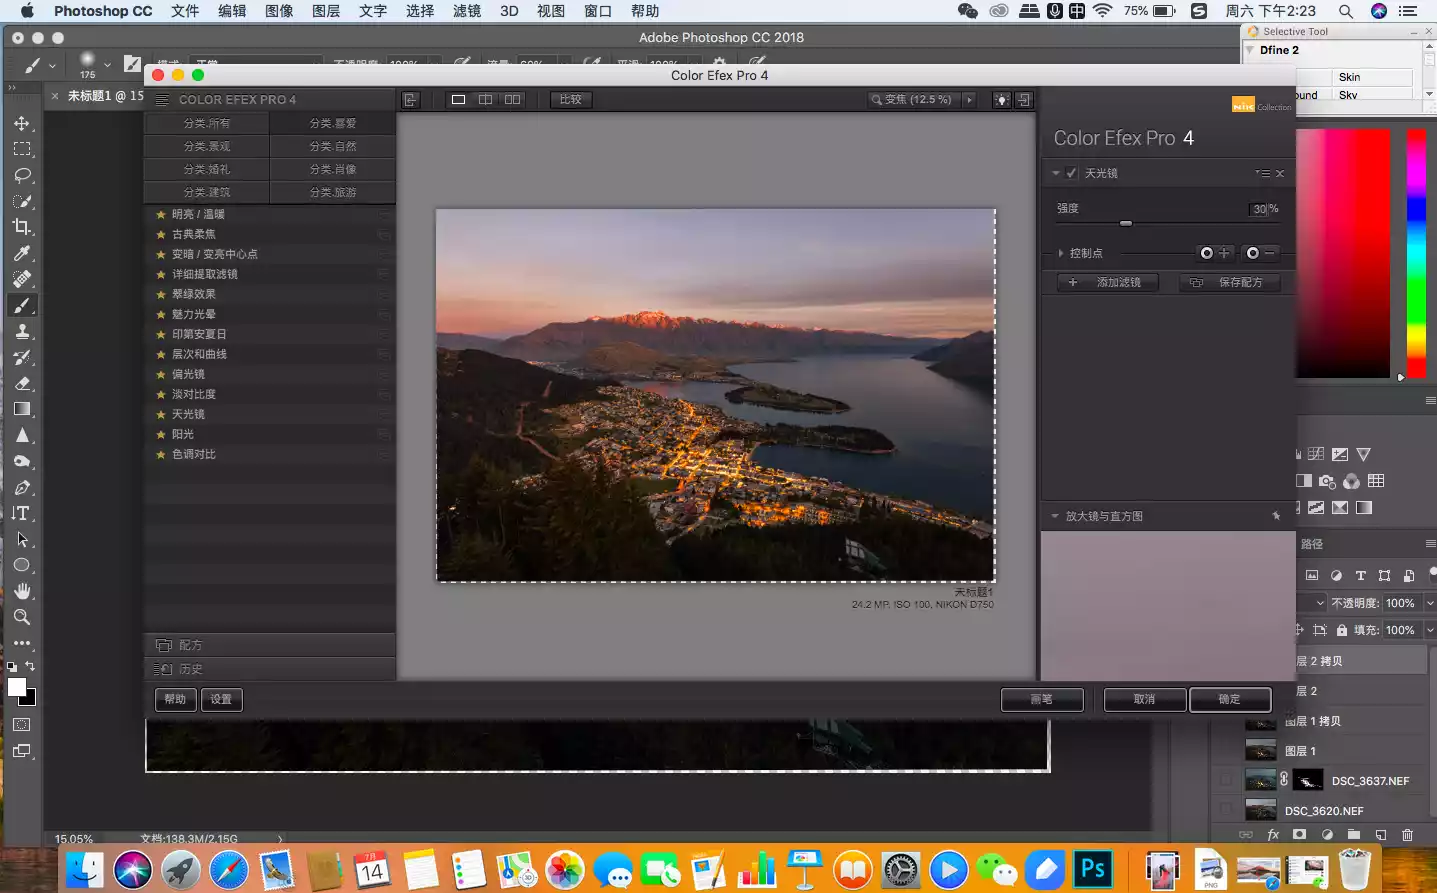
Next, I want to enhance the sunset in the sky and the color of the train tracks, so I’ll use my favorite filter, the “Skylight” filter. After entering the Efex interface, the effect will look like this, and then I’ll enter the PS interface.
Tips:
The commonly used filters in Efex Pro, Light Contrast and Hue Contrast, both use built-in algorithms to adjust the saturation, contrast, and clarity of the image to improve image quality. The difference is that Light Contrast is gentler and can be applied globally, while Hue Contrast is more aggressive and can generally only be used with caution on the main part of the image.
In the PS interface, you can see that the Skylight filter works on the entire image, which is not the effect we want. I only want it to work on the highlight part.
So I used the Starstail plug-in again, created a mask, and let the Skylight filter affect only the highlights. In this way, the colors of our sky and train tracks were strengthened, further highlighting the effect of the contrast between cold and warm.
Tips:
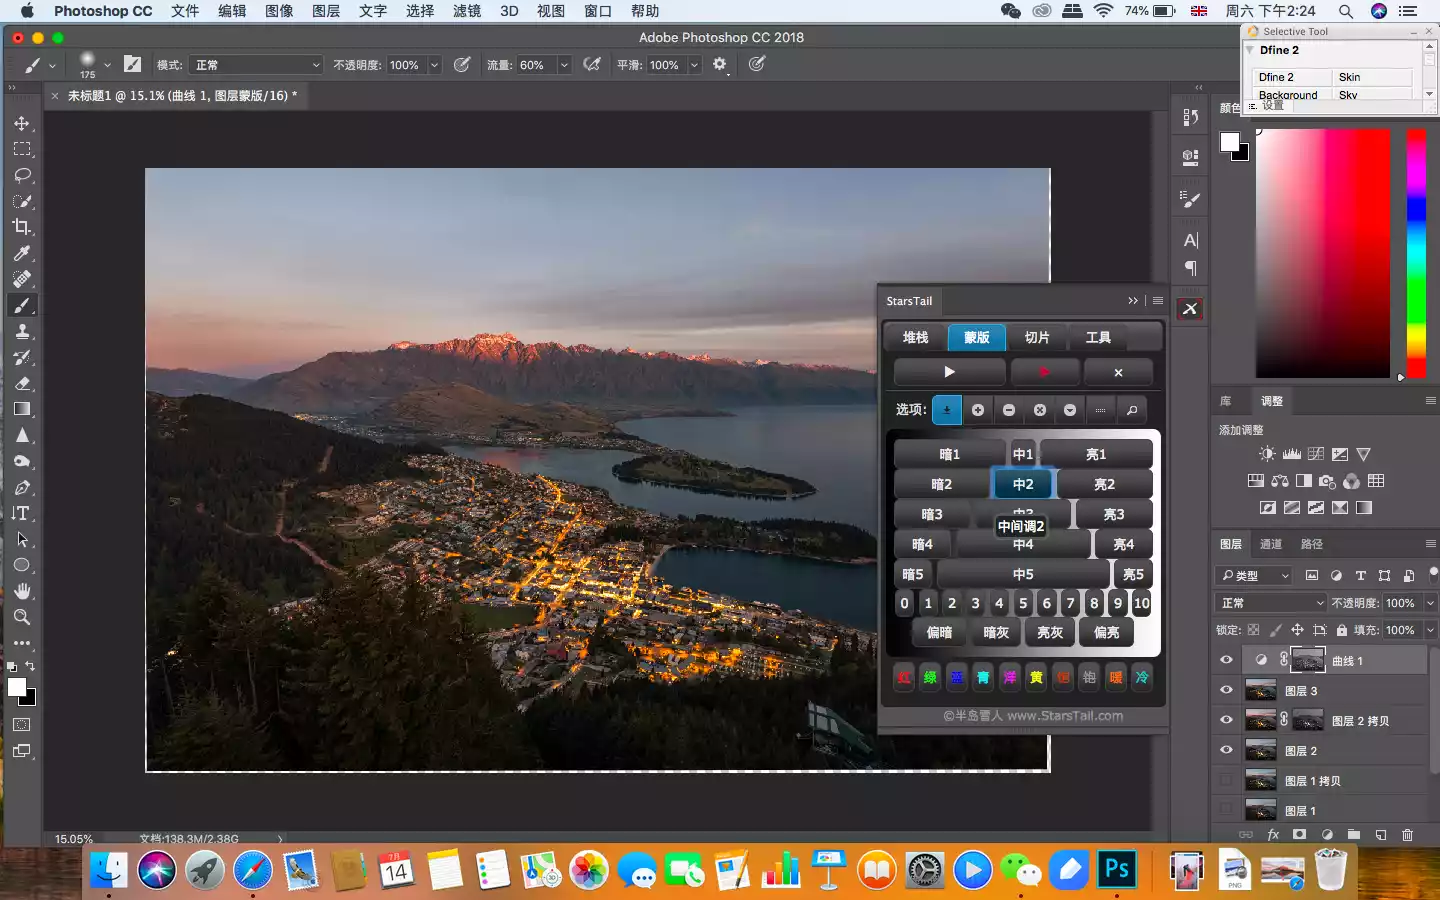
The Starstail plug-in was developed by photographer Peninsula Snowman. Its main function is to complete the tedious operation of creating highlights, shadows, and mid-tone selections with one click. The foreign plug-in of the same type, TK, is also good and can be tried.

In order to improve the transparency of the picture, I created a curve to increase the contrast.
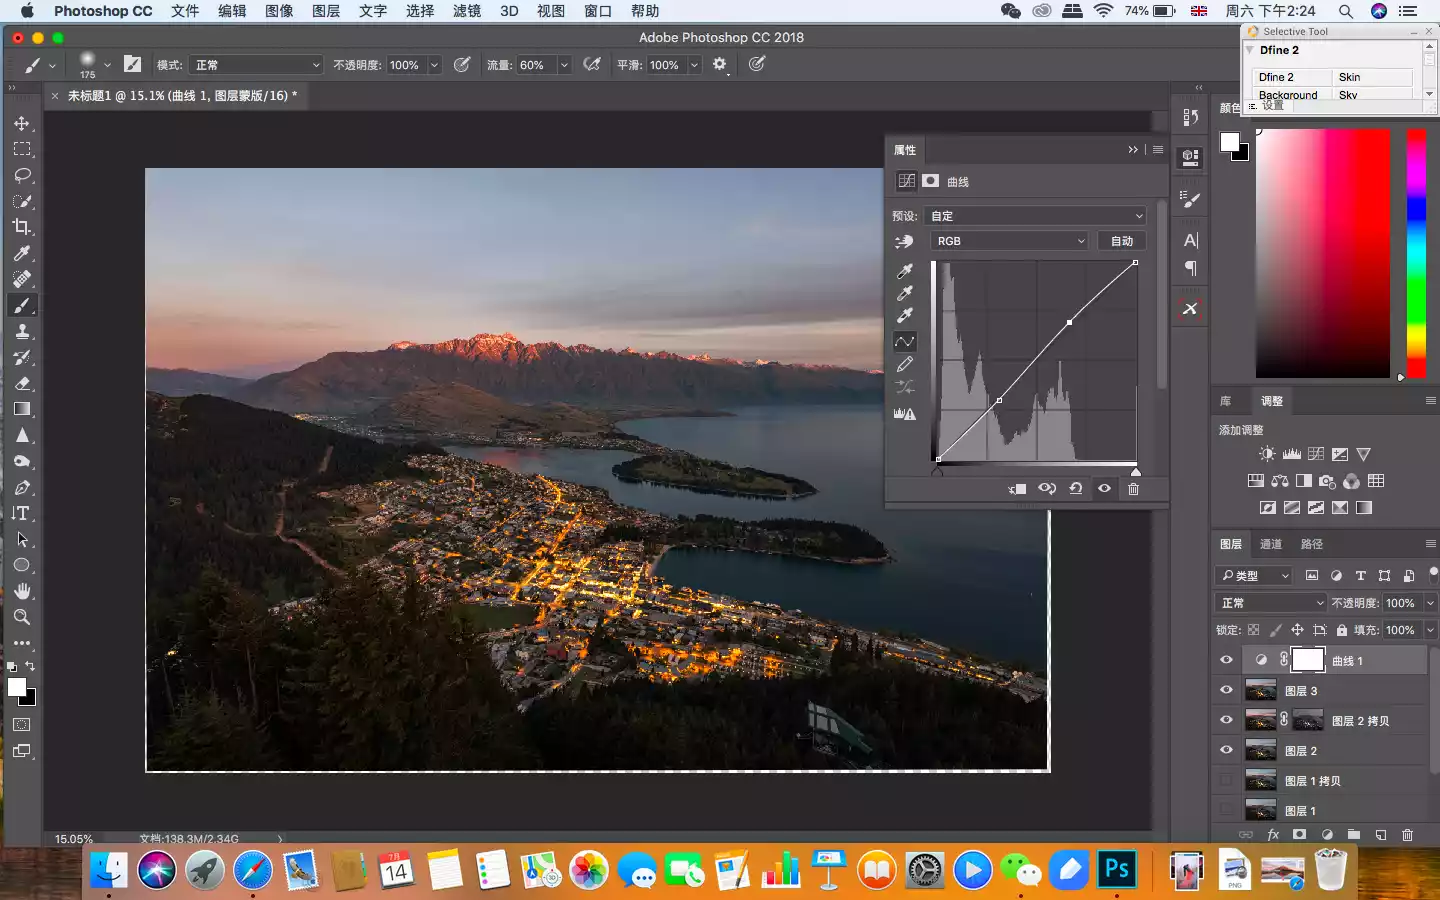
The biggest concern when increasing the contrast is overexposure of highlights and loss of shadow details, so I used the Starstail plug-in to create a midtone mask so that the contrast curve would not affect the highlights and shadows.
At this point, we're done improving the image quality. Next, I need to do the usual noise reduction and sharpening. I also use plugins to automate both of these operations, and the results are excellent.
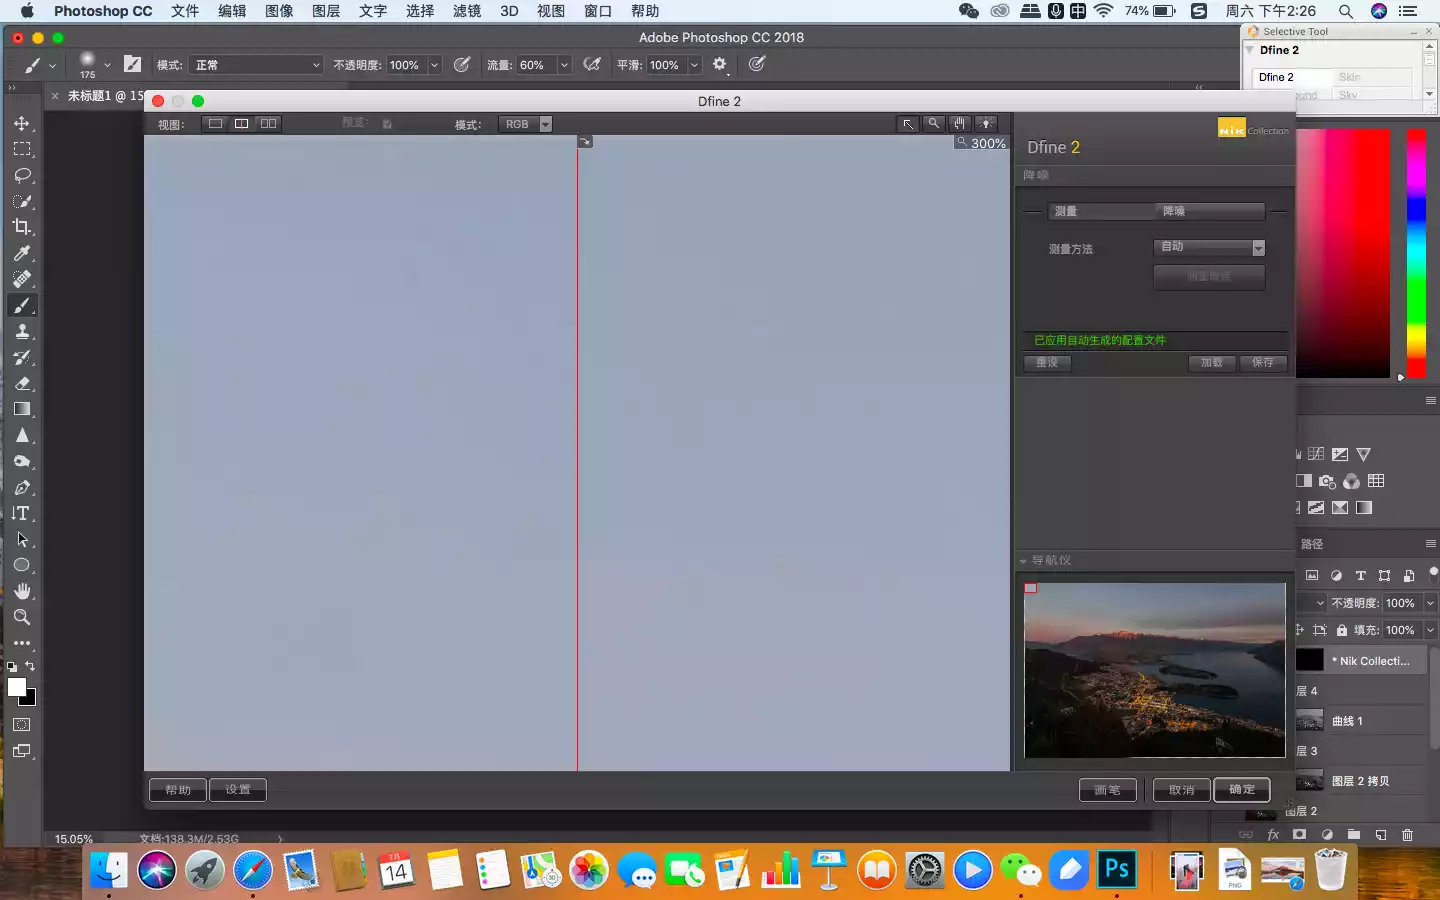
Use Dfine 2 for noise reduction.
Tips:
Dfine 2's algorithm is very mature, and unless it is a galaxy theme, no additional manual adjustments are required.
For sharpening I use Sharpener.
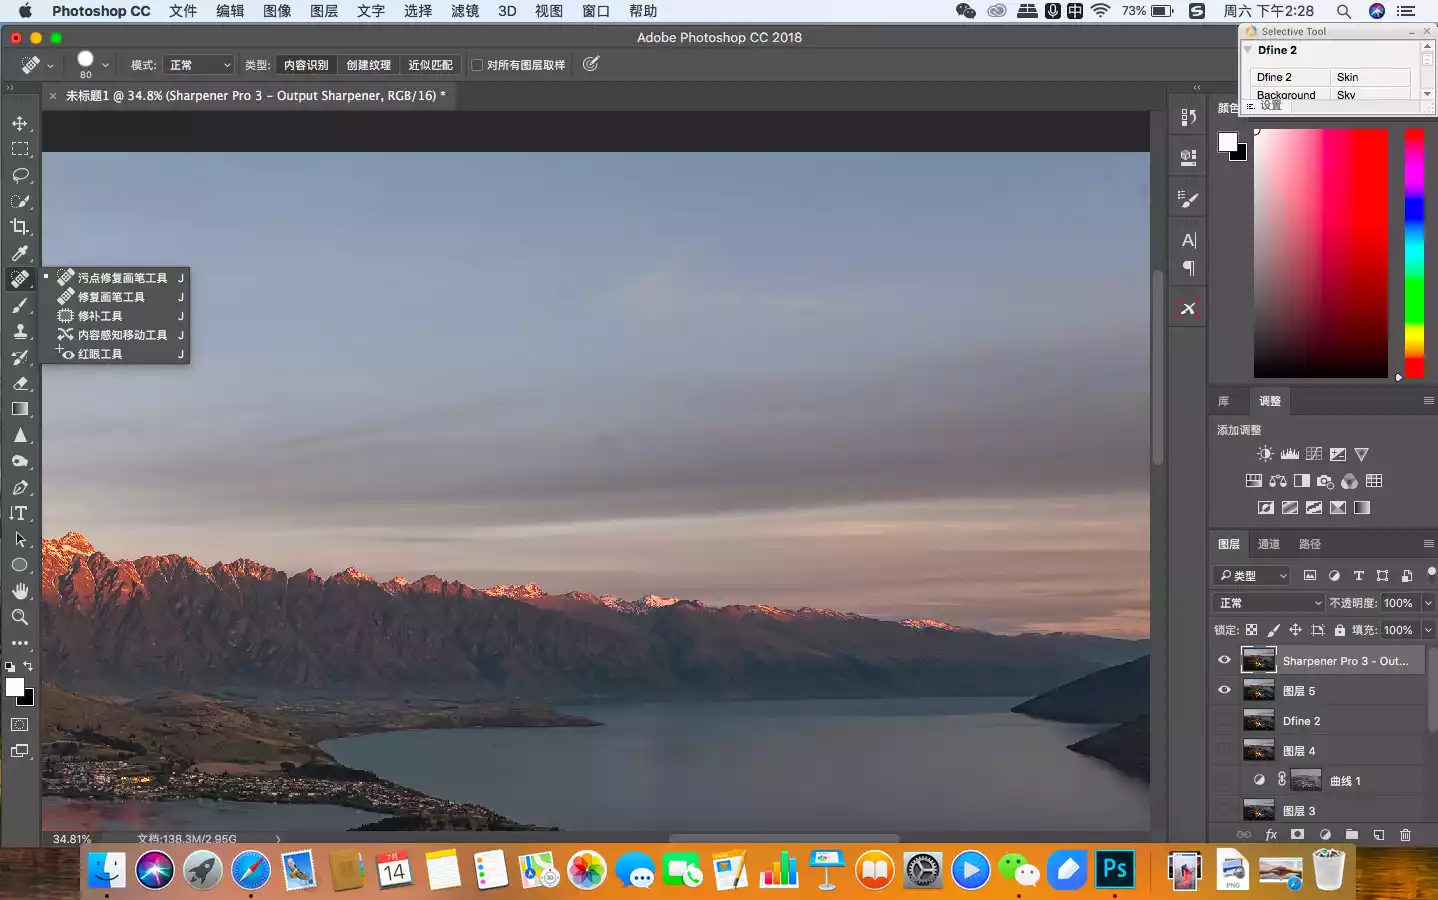
Finally, we'll look at removing some image blemishes.
Because the building was photographed from a distance, wide-angle distortion isn't an issue. However, if we zoom in on the image, we can see that the camera's CMOS is not clean, resulting in a lot of smudges in the sky that require a patch tool to remove. This isn't a very technical task; it just requires carefulness and patience.
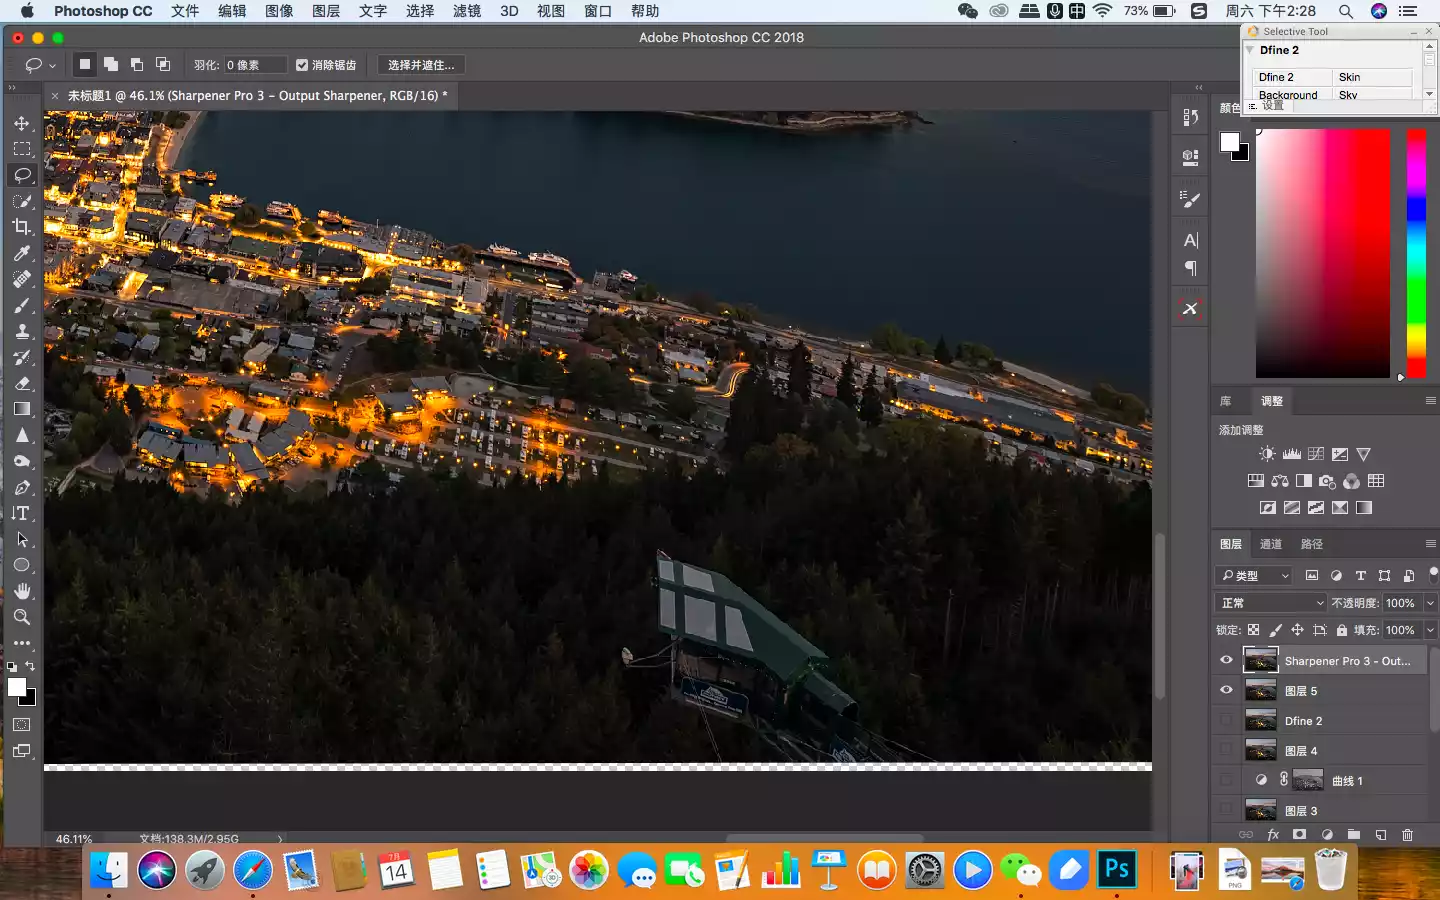
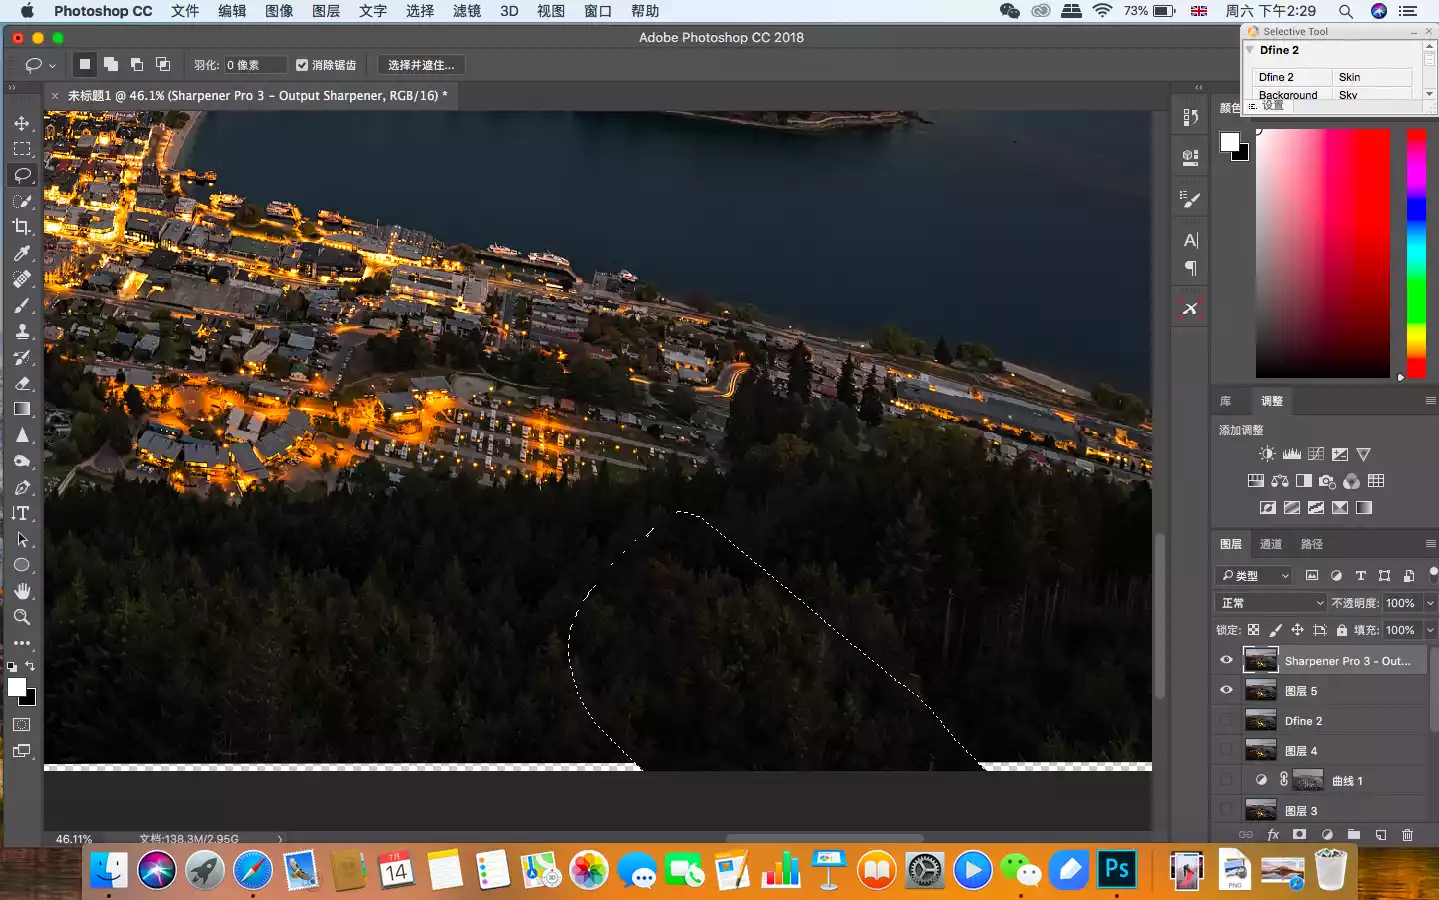
Next, I want to remove the glass building in the woods, which I find annoying. Select the Lasso Tool and select the area.
Then, fill-in-content recognition is performed to replace the obstructing buildings with trees, thus avoiding distracting the audience's attention from the main part.

After that, trim off the extra parts caused by automatic alignment, save and complete the output to get a satisfactory stair climbing photography work.
We also typically soften clouds in the sky and water surfaces in the landscape. This operation is complex and difficult to master, so this article will only introduce the concept without going into detail.

Well, have you learned the post-production of building a stair climb? If not, please leave a message~
Note: This picture and text are from [Ding Yifeng]